1. Drain Coolant (even if you are only changing the motor. The whole assembly has to come out)
2. Disconnect heater hoses
3. Disconnect vent door cables (3 of them. Two in front, one on the side of the housing between said housing and body. One below passenger side speaker. (Unscrew the nut and slide the whole thing off each shaft.)
4. Disconnect blower motor wire. (On top of housing, center, 2 blade plug.)
5. Disconnect defroster duct. (I just loosened up the bottom clamp and removed it after the housing was out of the way.)
6. Remove nuts that attach heater housing studs to the engine compartment side of the dash panel. (This is where the pictures might help out.)
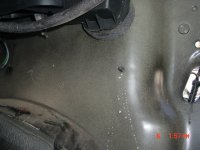
First off, remove the Battery and tray. There are four studs that hold it to the firewall, and two that attach it to the fender that are all 1/2 inch. The fuse box can be removed from the battery tray without disconnecting any wires. Three of the bolts are under the tray, and one is behind the valve cover, on the driver side. All of the nuts are the same size, 7/16. See pics.
7. Remove heater housing assembly by tiling it downward, to disengage it from the defroster duct. Pull it rearward and out from under the instrument panel.
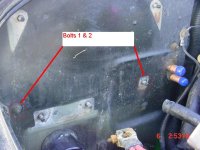
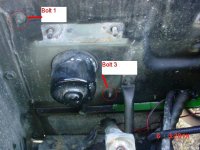
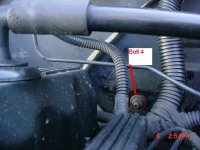
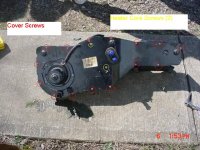
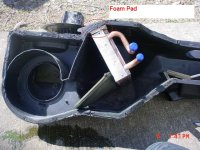
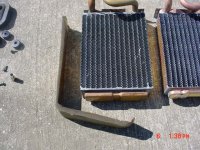
Now you need to disassemble the box. Should look like like the pic below. Remove cover screws and heater core screws. If you are changing the core, once you get it out, carefully remove the foam pad from the old core and wrap the new core with it to avoid rattles.
If you are changing the blower motor, all you have to do once you get the cover off, is remove the motor-to-heater housing attaching screws/nuts. Might want to change the core too, since you are already there. $40 from Advance Auto is cheap insurance.
Once you're ready to button up the assembly, make sure the seal is on the housing right, (more of a tar-like substance than a seal), line up the cover, housing and door shafts. Put each screw in a half turn, and make sure there is no gap at the curve in the box. You'll see what I mean when the thing is on the bench. Tighten up all the screws, slip on the pad around the core inlet/outlet pipes, and you are ready to re-install. Make sure the four rubber donuts are all accounted for, (two of mine were still stuck to the firewall), on each of the mounting studs that run through the firewall.
Now is also a good time to find out where that water that leaks every time it rains, before you stick in the assembly. Mine leaked at the pad where the fresh air comes in the vent behind the hood.
Reassembly
1. Position heater housing on the dash panel. Be sure the housing studs extend through the dash panel.
2. Install attaching nuts on the housing studs.
3. Connect blower motor wire
4. Connect vent door cables
5. Connect heater hoses
6. Fill cooling system (move heater control to hot)
7. Check system operation
