Subwoofer inside of a Jeep Wrangler rear seat

Ive seen people mount the amp under the rear seat. Under he front seats and in the middle console. Even in the back seat seat back. But then you loose the ability to remove the seat if needed.


Ive been running a kenwook powered sub with two 6in speakers. I like it. Better than stock.

JPNinPA
Using Jeepz.com app
 
Last edited:
So I initially came across this post probably about 9 years ago and I got super interested in putting a box in my 97 TJ. I found SirGCal's site and downloaded the schematic that he had created and put my woodworking skills to the test and built my own box for a single 10" sub. Recently (Sept 21) I was in a head-on wreck when someone pulled out in front of me at a turn signal. Sadly, at 55 mph with only ~15 yards to react there wasn't much I could do and my TJ took the brunt of the punishment. That old, good hunk of metal probably saved my life but gave its in return. Still feeling the pain but I came across my old build and the original schematic in my files. I joined the forum just so I could upload my stuff so that people could customize their own Jeeps with this awesome design. Below will start with the schematic and a diagram of what my system setup was like. I only have the printout for the full size box. It looks like the one that Terry built was for a shallow mount sub. My box barely fit my speaker, but then again it was a competition grade sub.

As far as I can remember, this box is limited to only TJ models. I'm not even sure if it goes all the way to '06 but it definitely works for the earlier TJ's. EDIT: I found my original printout! There was another page to the schematic but it mainly just an overview of where everything fits. Probably the best thing is since every measurement is in decimals I converted them all to fractions to give myself an easier time measuring.
 

Attachments

  • sound setup.jpg
    sound setup.jpg
    113.4 KB · Views: 86
  • pieces.jpg
    pieces.jpg
    78.9 KB · Views: 571
  • tjsubbox02.jpg
    tjsubbox02.jpg
    1.1 MB · Views: 86
  • tjsubbox01.jpg
    tjsubbox01.jpg
    1.3 MB · Views: 84
Last edited:

Cutting the pieces and prepping. I don't remember what thickness I used. I do remember SirGCal had the recommendation for thickness but I can't remember. I do know that the inside volume of this particular box came out to .87 cuft which is what my sub recommended.
 

Attachments

  • 2011-09-10 16.44.41.jpg
    2011-09-10 16.44.41.jpg
    605.3 KB · Views: 45
  • 2011-09-10 16.44.51.jpg
    2011-09-10 16.44.51.jpg
    559.2 KB · Views: 48
  • 2011-09-11 15.23.47.jpg
    2011-09-11 15.23.47.jpg
    583.9 KB · Views: 46
  • 2011-09-17 12.15.26.jpg
    2011-09-17 12.15.26.jpg
    566.7 KB · Views: 50
  • 2011-09-18 15.32.02.jpg
    2011-09-18 15.32.02.jpg
    539.8 KB · Views: 50
Beginning to put all the pieces together. I used wood glue and screws to secure everything together and then sprayed sound dampener and caulked the inside of the box just to make sure everything was sealed. I would definitely recommend pre-drilling if you're going with screws because that's how I split that narrow, long strip on the downward angle (hence all the clamps on that piece to help the wood glue to close the split).
 

Attachments

  • 2011-09-18 16.38.10.jpg
    2011-09-18 16.38.10.jpg
    592.3 KB · Views: 55
  • 2011-09-18 22.03.28.jpg
    2011-09-18 22.03.28.jpg
    553 KB · Views: 52
  • 2011-09-19 19.04.28.jpg
    2011-09-19 19.04.28.jpg
    598.6 KB · Views: 57
  • 2011-09-23 15.30.35.jpg
    2011-09-23 15.30.35.jpg
    598.9 KB · Views: 58
Cut the sub hole and secured the top piece. Then drilled holes and used 1/4" tee nuts to secure the sub to the box. I added the wire terminal on my own, I know some people might say "that's just an extra connection that could screw up," but I wanted the option to pull the seat out if I ever needed to. Besides, I never had a problem with my sound.
 

Attachments

  • 2012-04-01 15.38.48.jpg
    2012-04-01 15.38.48.jpg
    533.5 KB · Views: 58
  • 2012-04-01 21.59.52.jpg
    2012-04-01 21.59.52.jpg
    607.7 KB · Views: 62
  • 2012-03-31 16.55.06.jpg
    2012-03-31 16.55.06.jpg
    534 KB · Views: 54
  • 2012-03-31 12.17.56.jpg
    2012-03-31 12.17.56.jpg
    627.8 KB · Views: 56
Last edited:

Just like with Terry's post I had to cut open the seat, cut the support rods for the cushion off the frame, gut the foam so that everything could fit, and then shove it all back in. The pictures get sporadic at the end because I was kinda dragging my feet about the whole thing (worried about screwing up the rear seat) and my wife told me to just do and get it done, so that's what I did. I did use a solid piece of angle iron to secure the front and the back of the box. I didn't want that thing to go ANYWHERE. Also, for the foam on this full size box you probably want to leave about an inch worth of foam. I left more (because I was doing it haphazardly) and it was a tight fit to get the cover back on. I did but the seat was rather poofy and the kiddos didn't mind.
 

Attachments

  • 2012-04-04 16.31.37.jpg
    2012-04-04 16.31.37.jpg
    617.5 KB · Views: 66
  • 2012-04-04 16.31.49.jpg
    2012-04-04 16.31.49.jpg
    619.7 KB · Views: 69
  • 2012-04-04 19.00.44.jpg
    2012-04-04 19.00.44.jpg
    612 KB · Views: 63
  • 2012-04-04 20.46.07.jpg
    2012-04-04 20.46.07.jpg
    611.1 KB · Views: 61
  • 2012-04-06 15.50.28.jpg
    2012-04-06 15.50.28.jpg
    563.8 KB · Views: 61
Last edited:
So here is how I mounted the equalizer in the glove box. I cut out the back end for all the RCA connectors to run through and it was just far back enough to not hit the latch while I closed it. The hole I put in never interfered with anything that was in the dash either. The next project was to add the two separate amplifiers in under the seats. I did a lot of research in order to find one with just the right footprint to go under the passenger seat.
 

Attachments

  • 2011-09-29 11.58.47.jpg
    2011-09-29 11.58.47.jpg
    628.7 KB · Views: 36
  • 2011-09-29 11.59.04.jpg
    2011-09-29 11.59.04.jpg
    623.3 KB · Views: 35
  • 2012-04-14 13.31.21.jpg
    2012-04-14 13.31.21.jpg
    535.6 KB · Views: 35
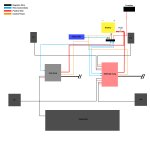
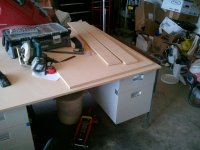
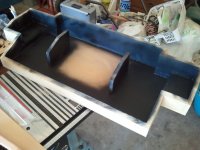
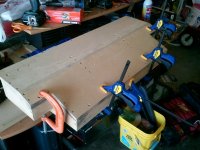
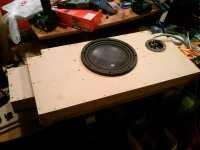
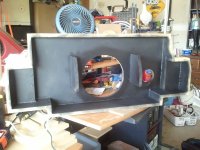
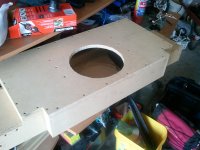
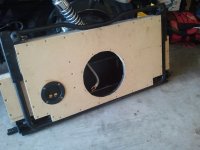
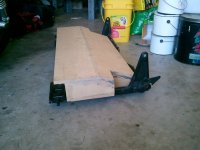
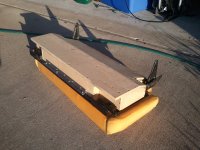
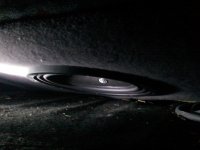
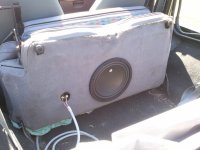
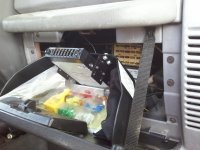
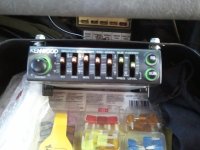
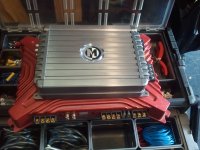
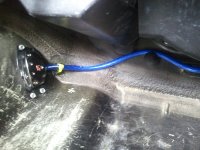
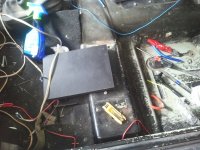
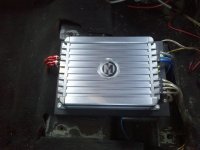
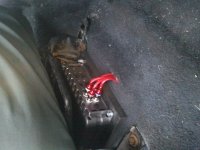
I ran a 4 gauge wire and then ran a splitter right at the front of the center console to run two 8 gauge power cables for each amp. Then I sprayed a leftover MDF board with truck liner so I could mount the mids/highs, 4 channel amp to the board (and the body underneath). I did have to make some "feet" for the back part of the board just to provide stability for that amp. The end build came out perfectly and the amp was nearly invisible to anyone looking in. The red RCA cables, on the other hand, were a dead giveaway. I never did secure the bass amp underneath the driver seat and that did give me some grounding issues. But those were fixed with more rags for cushioning. lol In the end I had a Pioneer head unit, a Kenwood EQ, 4"x6" component Memphis speakers in the front, 5.5" coaxial speakers mounted in rollbar pods on the floor, a 10" MClass sub with a massive 65 oz magnet, a 4 channel 80W nominal amp for the mids/highs, and a 2 channel 150W (bridged) nominal sub amp. Took me years to save and complete and I had many years to enjoy...just wish it could've been longer. But I do have all my stuff now, it was the first things out of the Jeep at the wrecker's. Just wish I had something else to put them in. I hope this information can help some people find an awesome way to get that banging sound out of their Jeeps without having to sacrifice that precious cargo space. Take care.

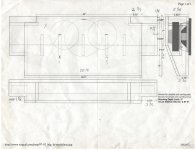
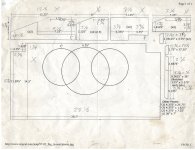
(Those last two pictures should be rotated clockwise...don't know why they didn't)
 

Attachments

  • 2012-04-14 13.31.56.jpg
    2012-04-14 13.31.56.jpg
    592.1 KB · Views: 35
  • 2012-04-14 13.32.18.jpg
    2012-04-14 13.32.18.jpg
    623.9 KB · Views: 47
  • 2012-04-15 19.29.31.jpg
    2012-04-15 19.29.31.jpg
    570.9 KB · Views: 35
  • 2012-04-15 19.30.15.jpg
    2012-04-15 19.30.15.jpg
    617.2 KB · Views: 33
  • 2012-04-15 19.38.40.jpg
    2012-04-15 19.38.40.jpg
    568 KB · Views: 36

did this as well:
Box = 30.5x19.5x4.25 - used speaker rings to mount subs giving .75 more air volume also used poly fil to make the subs believe the box is bigger than it really is
Speakers = 2 MTX 10" shallow subs
Amp = MTX Thunder500 Mono amp
Head unit = Alpine HD149BT with KA445A inline amp for Polk 655 speakers in dash and roll bar...

Shaved down the foam and the rear seat looks stock...
 
Back
Top