1994 Jeep Grand Cherokee 4.0 Transmission Slipping.

DeadHammer

New member
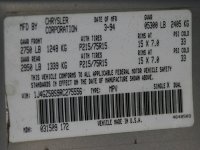
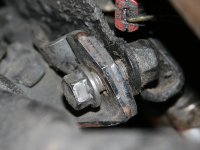
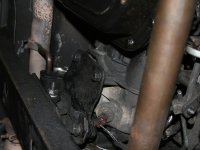
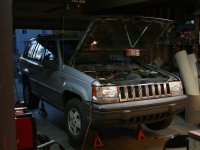
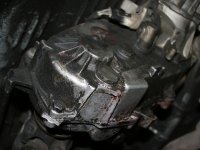
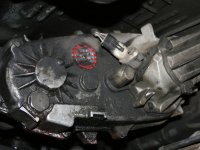
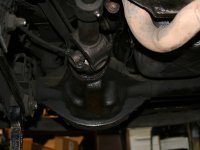
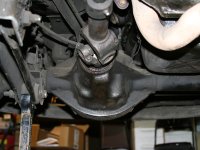
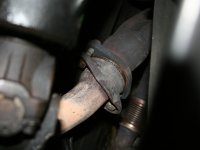
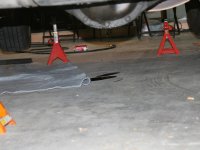
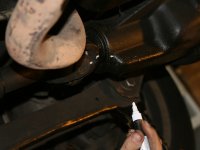
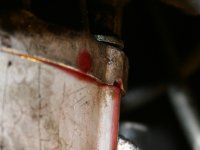
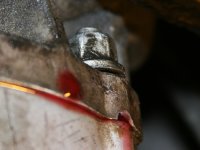
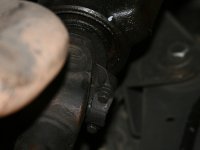
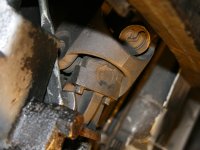
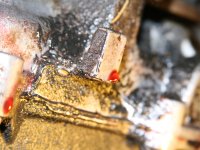
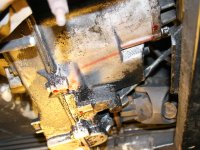
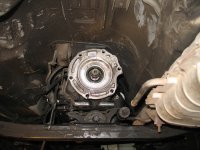
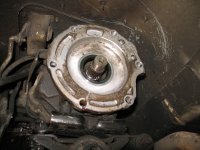
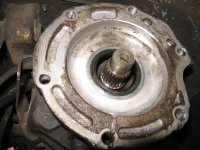
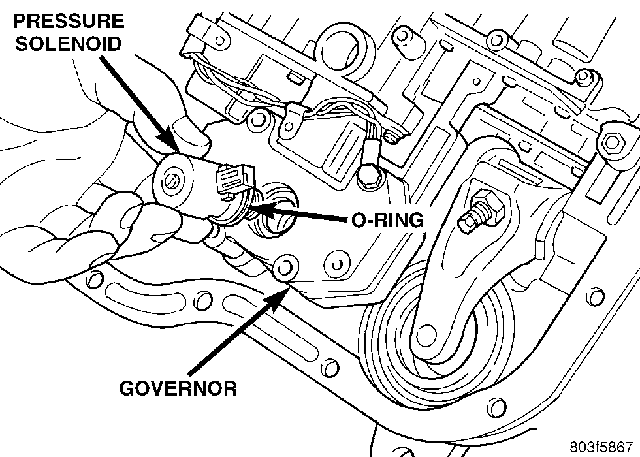
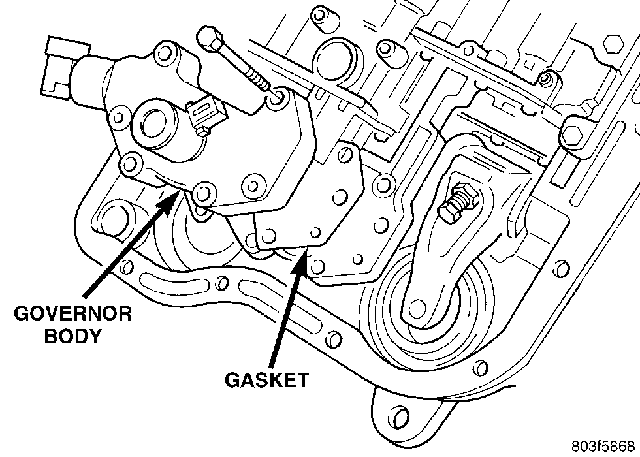
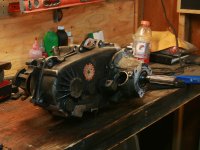
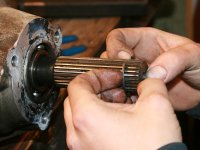
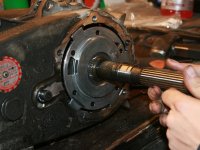
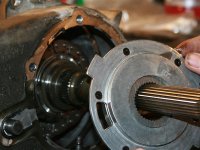
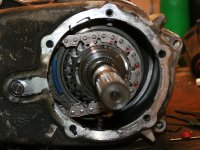
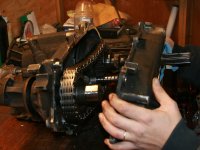
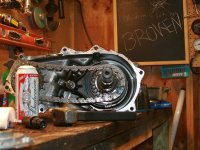
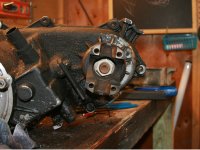
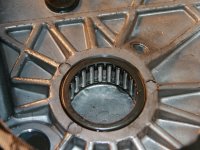
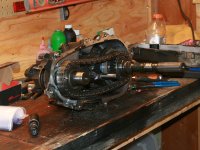
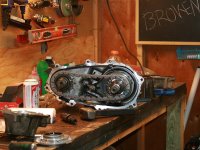
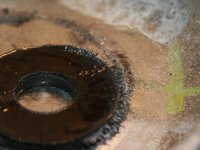
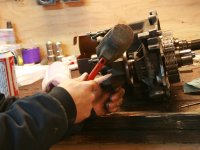
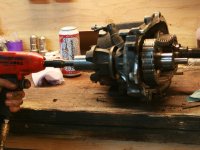
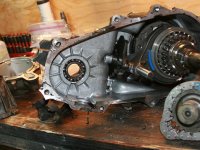
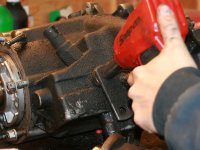
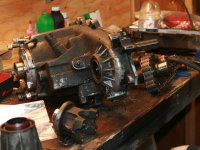
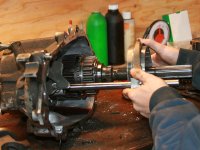
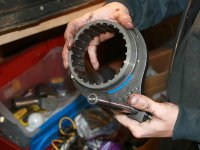
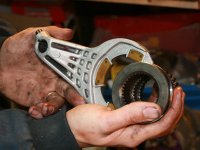
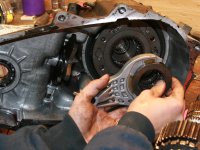
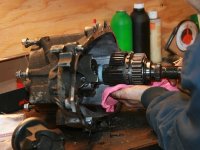
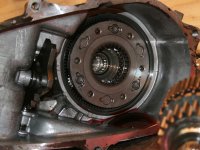
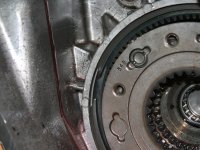
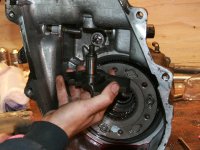
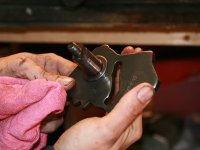
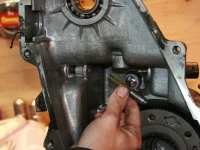
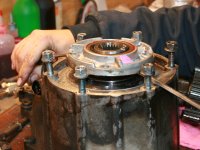
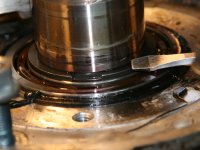
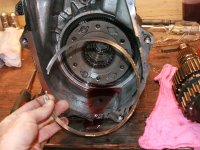
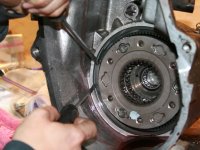
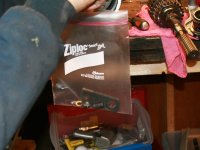
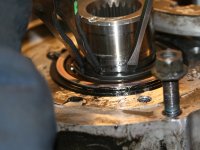
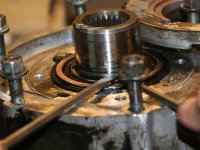
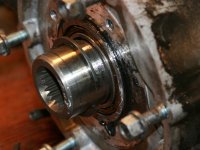
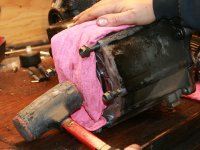
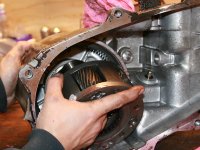
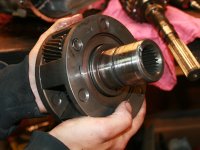
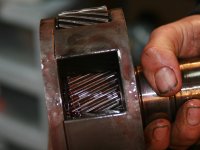
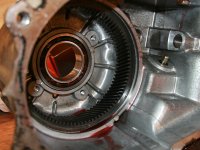
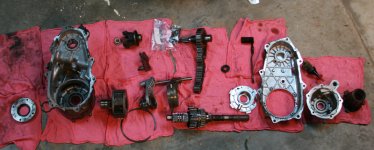
Saved a 94 4.0 Grand Cherokee from the crusher, it really only has one major problem. The transmission is leaking very badly at the t-case, which I believe is where all the problems started with it being run dry (previous owner). It slips and hunts for a gear, also it will rev past 2500 rpm before it shifts (sometimes). I have been told solenoids, governor, valve body and throttle valve cable all could be the cause, it may just need a rebuild. The previous owner did not take care of it well. So is it salvageable or should I just rebuild it? How hard is a transmission rebuild? Can a rebuild be done with basic tools? What should I be looking at first (fluid is full, clean and correct type)? This jeep is for the family and we would love to keep it going! Thanks guys in advance.
 

Tough call, to rebuild or not to rebuild. It's always best to rebuild the transmission as a complete overhaul with new clutch packs steel plates and bands however, there are some of the clutch packs that requires a special tool and a press to remove the clutch packs from it's cage. The valve body isn't that bad to rebuild, just be careful of where the ball bearings go thats in the valve circuits. It might be easier and a lot less headache to find one off a junkyard.
 
well started tearing in the jeep today and was i got a surprise, almost every nut and bolt was loose. plus the transmission mount on the lower cross member is dented and banged up so badly it is going to need replacing, heres some photos we took of the carnage.
 

Attachments

  • IMG_8169.JPG
    IMG_8169.JPG
    115.6 KB · Views: 622
  • IMG_8171.JPG
    IMG_8171.JPG
    175.6 KB · Views: 798
  • IMG_8172.JPG
    IMG_8172.JPG
    163.2 KB · Views: 771
  • IMG_8173.JPG
    IMG_8173.JPG
    148.9 KB · Views: 645
  • IMG_8168.JPG
    IMG_8168.JPG
    169.4 KB · Views: 1,367
  • IMG_8174.JPG
    IMG_8174.JPG
    163.5 KB · Views: 1,081
  • IMG_8175.JPG
    IMG_8175.JPG
    173.4 KB · Views: 1,238
  • IMG_8176.JPG
    IMG_8176.JPG
    126.9 KB · Views: 632
  • IMG_8177.JPG
    IMG_8177.JPG
    168.1 KB · Views: 1,299
  • IMG_8178.JPG
    IMG_8178.JPG
    105.5 KB · Views: 700
  • IMG_8184.JPG
    IMG_8184.JPG
    111.3 KB · Views: 476
  • IMG_8185.JPG
    IMG_8185.JPG
    135.8 KB · Views: 716
  • IMG_8183.JPG
    IMG_8183.JPG
    129.8 KB · Views: 779
  • IMG_8181.JPG
    IMG_8181.JPG
    137.4 KB · Views: 716
  • IMG_8180.JPG
    IMG_8180.JPG
    175.8 KB · Views: 525
  • IMG_8186.JPG
    IMG_8186.JPG
    120.6 KB · Views: 583
  • IMG_8187.JPG
    IMG_8187.JPG
    117.7 KB · Views: 516
  • IMG_8188.JPG
    IMG_8188.JPG
    138.9 KB · Views: 513
  • IMG_8189.JPG
    IMG_8189.JPG
    105 KB · Views: 708
  • IMG_8190.JPG
    IMG_8190.JPG
    162.5 KB · Views: 501
  • IMG_8191.JPG
    IMG_8191.JPG
    216.1 KB · Views: 550
  • IMG_8192.JPG
    IMG_8192.JPG
    252.6 KB · Views: 809
  • IMG_8193.JPG
    IMG_8193.JPG
    162.8 KB · Views: 586
  • IMG_8194.JPG
    IMG_8194.JPG
    164.5 KB · Views: 519
  • IMG_8198.JPG
    IMG_8198.JPG
    207.5 KB · Views: 1,285
  • IMG_8197.JPG
    IMG_8197.JPG
    218.4 KB · Views: 1,184
  • IMG_8195.JPG
    IMG_8195.JPG
    192.7 KB · Views: 515
  • IMG_8196.JPG
    IMG_8196.JPG
    196.9 KB · Views: 522
  • IMG_8199.JPG
    IMG_8199.JPG
    202 KB · Views: 579
  • IMG_8200.JPG
    IMG_8200.JPG
    178.6 KB · Views: 575
Hey quick question, is there supposed to be a seal between the overdrive unit and the transfer-case? Thats where the huge leak was coming from thus why I dropped the transfer-case. My Haynes repair manual is lacking a detailed exploded view of the drivetrain.
 

Attachments

  • IMG_5990.JPG
    IMG_5990.JPG
    188.8 KB · Views: 3,602
  • IMG_5991.JPG
    IMG_5991.JPG
    194.1 KB · Views: 998
  • IMG_5992.JPG
    IMG_5992.JPG
    206.6 KB · Views: 1,798
Last edited:

Yes there is, it's that black rubber ring on the inside of the tailshaft housing seen on the picture. There's also a seal on the mating flange on the t.case side.
 
Thanks steelheadz but is there supposed to be a gasket between the overdrive housing and the t-case (sorry if i sound dumb)
 
Some does and some don't. The only thing that gasket will do is keep the dirt and water out. For that matter, you can use an ATF RTV.
 

well started tearing in the jeep today and was i got a surprise, almost every nut and bolt was loose. plus the transmission mount on the lower cross member is dented and banged up so badly it is going to need replacing, heres some photos we took of the carnage.
that was probably the whole problem, making sure everything was tight.
 
Just a quick update on the Grand Cherokee, I noticed that the throttle valve cable is broken so that explains why the over drive was acting funny, so that will get replaced, I'm going to overhaul the NP 231 transfer case and drop the transmission pan to adjust the bands , replace the filter and pan gasket for sure (also add a drain plug and maybe a temperature sensor). I would like to replace the seal on the back of the over drive housing but I'm not sure if I can do that without tearing down the the overdrive unit. And I would also like to know more about replacing the 42RE's governor. Any advice or do's and don'ts would be greatly appreciated. I'm working 10 hour plus shifts right now but when I have the time I will post more pictures. Right now the jeep is up in the air in the garage on a trickle charge keeping the battery fresh (I've been told the computer can loose it's map if the battery is drained for long periods of time). Thanks for any advice in advance guys!
 
TRANSMISSION/OVERDRIVE INSTALLATION

  1. Check torque converter hub and hub drive notches for sharp edges burrs, scratches, or nicks. Polish the hub and notches with 320/400 grit paper and crocus cloth if necessary. The hub must be smooth to avoid damaging pump seal at installation.
  2. Lubricate converter drive hub and oil pump seal lip with transmission fluid.
  3. Lubricate converter pilot hub with transmission fluid.
  4. Align and install converter in oil pump.
  5. Carefully insert converter in oil pump. Then rotate converter back and forth until fully seated in pump gears.
  6. Check converter seating with steel scale and straightedge Typical Method Of Checking Converter Seating Surface of converter lugs should be 1/2 in. to rear of straightedge when converter is fully seated.
  7. Temporarily secure converter with wedge tool or C-clamp.
  8. Position transmission on jack and secure it with chains.
  9. Check condition of converter driveplate. Replace the plate if cracked, distorted or damaged. Also be sure transmission dowel pins are seated in engine block and protrude far enough to held transmission in alignment.
  10. Raise transmission and align converter with drive plate and converter housing with engine block.
  11. Move transmission forward. Then raise, lower or tilt transmission to align converter housing with engine block dowels.
  12. Rotate converter so alignment marks scribed on converter are aligned with mark on driveplate.
  13. Carefully work transmission forward and over engine block dowels until converter hub is seated in crankshaft.
  14. Install bolts attaching converter housing to engine.
  15. Install rear support. Then lower transmission onto crossmember and install bolts attaching transmission mount to crossmember.
  16. Remove engine support fixture.
  17. Install crankshaft position sensor.
  18. Install vehicle speed sensor and speedometer adapter.
  19. Install new plastic retainer grommet on any shift linkage rod or lever that was disconnected. Grommets should not be reused. Use pry tool to remove rod from grommet and cut away old grommet. Use pliers to snap new grommet into lever and to snap rod into grommet at assembly.
  20. Connect gearshift and throttle cable to transmission.
  21. Connect wires to park/neutral position switch, transmission solenoid(s) and oxygen sensor. Be sure transmission harnesses are properly routed [SIZE=+1]CAUTION: It is essential that correct length bolts be used to attach the converter to the driveplate. Bolts that are too long will damage the clutch surface inside the converter. If new bolts are required, use the bolts specified in the parts catalog only. [/SIZE]
  22. Install torque converter-to-driveplate bolts. On models with 10.75 in. converter, tighten bolts to 31 N·m (270 in. lbs.) On models with 12.2 in. converter, tighten bolts to 47 N·m (35 ft. lbs.)
  23. Install converter housing access cover.
  24. Install starter motor and cooler line bracket.
  25. Connect cooler lines to transmission.
  26. Install transmission fill tube. Install new seal on tube before installation.
  27. Install exhaust components.
  28. Align and connect propeller shaft.
  29. Adjust gearshift linkage and throttle valve cable if necessary.
  30. Lower vehicle.
  31. Fill transmission with Mopar ATF Plus, Type 7176 fluid.
Gov. pressure solenoid:
803f5867-1.gif

803f5868-1.gif
 

Pics from the tear down of my NP231 will order rebuild kit and take more pics hope these pics can help someone else with a tear down.
 

Attachments

  • IMG_8317.JPG
    IMG_8317.JPG
    186.9 KB · Views: 743
  • IMG_8318.JPG
    IMG_8318.JPG
    192 KB · Views: 868
  • IMG_8315.JPG
    IMG_8315.JPG
    175.9 KB · Views: 512
  • IMG_8313.JPG
    IMG_8313.JPG
    223.6 KB · Views: 730
  • IMG_8311.JPG
    IMG_8311.JPG
    198.4 KB · Views: 733
  • IMG_8319.JPG
    IMG_8319.JPG
    179 KB · Views: 515
  • IMG_8320.JPG
    IMG_8320.JPG
    197.3 KB · Views: 1,020
  • IMG_8321.JPG
    IMG_8321.JPG
    192.7 KB · Views: 728
  • IMG_8322.JPG
    IMG_8322.JPG
    220 KB · Views: 922
  • IMG_8323.JPG
    IMG_8323.JPG
    181.1 KB · Views: 755
  • IMG_8328.JPG
    IMG_8328.JPG
    228.2 KB · Views: 1,100
  • IMG_8325.JPG
    IMG_8325.JPG
    168.9 KB · Views: 521
  • IMG_8327.JPG
    IMG_8327.JPG
    209.5 KB · Views: 735
  • IMG_8324.JPG
    IMG_8324.JPG
    222.4 KB · Views: 637
  • IMG_8326.JPG
    IMG_8326.JPG
    223.3 KB · Views: 919
  • IMG_8329.JPG
    IMG_8329.JPG
    227.2 KB · Views: 1,334
  • IMG_8330.JPG
    IMG_8330.JPG
    169.9 KB · Views: 508
  • IMG_8331.JPG
    IMG_8331.JPG
    138.7 KB · Views: 390
  • IMG_8332.JPG
    IMG_8332.JPG
    171.3 KB · Views: 556
  • IMG_8335 shop heat.jpg
    IMG_8335 shop heat.jpg
    224.2 KB · Views: 316
  • IMG_8339.JPG
    IMG_8339.JPG
    123.7 KB · Views: 510
  • IMG_8341.JPG
    IMG_8341.JPG
    243.7 KB · Views: 1,525
  • IMG_8340.JPG
    IMG_8340.JPG
    180.4 KB · Views: 541
  • IMG_8338.JPG
    IMG_8338.JPG
    178.5 KB · Views: 576
  • IMG_8336.JPG
    IMG_8336.JPG
    194 KB · Views: 628
  • IMG_8342.JPG
    IMG_8342.JPG
    229 KB · Views: 2,986
  • IMG_8343.JPG
    IMG_8343.JPG
    200.2 KB · Views: 599
  • IMG_8344.JPG
    IMG_8344.JPG
    212.6 KB · Views: 695
  • IMG_8345.JPG
    IMG_8345.JPG
    199.1 KB · Views: 525
  • IMG_8346.JPG
    IMG_8346.JPG
    179.9 KB · Views: 580
  • IMG_8351.JPG
    IMG_8351.JPG
    184.6 KB · Views: 569
  • IMG_8350.JPG
    IMG_8350.JPG
    216 KB · Views: 1,365
  • IMG_8348.JPG
    IMG_8348.JPG
    193.5 KB · Views: 524
  • IMG_8347.JPG
    IMG_8347.JPG
    195.7 KB · Views: 516
  • IMG_8349.JPG
    IMG_8349.JPG
    219.7 KB · Views: 865
  • IMG_8352.JPG
    IMG_8352.JPG
    195.4 KB · Views: 853
  • IMG_8355.JPG
    IMG_8355.JPG
    199.1 KB · Views: 542
  • IMG_8357.JPG
    IMG_8357.JPG
    204.4 KB · Views: 852
  • IMG_8358.JPG
    IMG_8358.JPG
    164.9 KB · Views: 538
  • IMG_8359.JPG
    IMG_8359.JPG
    191.2 KB · Views: 601
  • IMG_8363.JPG
    IMG_8363.JPG
    209.1 KB · Views: 708
  • IMG_8364.JPG
    IMG_8364.JPG
    171 KB · Views: 469
  • IMG_8362.JPG
    IMG_8362.JPG
    229.7 KB · Views: 1,082
  • IMG_8361.JPG
    IMG_8361.JPG
    190.1 KB · Views: 597
  • IMG_8360.JPG
    IMG_8360.JPG
    171.6 KB · Views: 451
  • IMG_8366.JPG
    IMG_8366.JPG
    173.5 KB · Views: 579
  • IMG_8367.JPG
    IMG_8367.JPG
    178.2 KB · Views: 692
  • IMG_8370.JPG
    IMG_8370.JPG
    170.5 KB · Views: 565
  • IMG_8371.JPG
    IMG_8371.JPG
    217.3 KB · Views: 484
  • IMG_8372.JPG
    IMG_8372.JPG
    213.5 KB · Views: 739
  • IMG_8373.JPG
    IMG_8373.JPG
    185.9 KB · Views: 718
  • IMG_8374.JPG
    IMG_8374.JPG
    168 KB · Views: 476
  • IMG_8375.JPG
    IMG_8375.JPG
    200.1 KB · Views: 1,288
  • IMG_8381.JPG
    IMG_8381.JPG
    147.9 KB · Views: 528
  • IMG_8382.JPG
    IMG_8382.JPG
    176 KB · Views: 548
Quick up date, After cleaning all the bearings and running my finger nail across main shaft and front output shaft. Then very very slowly rotating the bearing by the inner cage feeling for any scaring, pitting and "bumpies". Then looking very closely at the gears syncros and chain. I'm 90% sure it just needs the seal kit, but having a veteran diesel mechanic come over and getting a second opinion on the condition of the parts tomorrow.
 
Just an update ordered the overhaul kit (part # TRS-TSK231J) from drivetrain.com, waiting on parts then ill post more pictures as I replace the seals in the t case then I will open up the transmission and will take more pictures and post them. More pictures is better right?
 

Well put the transfer case back together, but instead of taking editing and posting a lot pictures I made 4 videos about it, after a test drive the transmission feels great, funny how what started as a question about the transmission slipping turned into a transfer case service. Any way thank you all for your help, hope you enjoy my videos (pg 13). And happy 2011

 
Back
Top