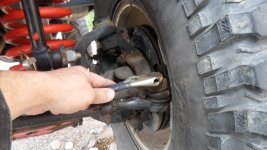
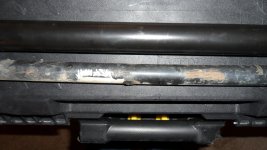
The next step is to remove the stock (in this case damaged) tie rod. To begin, start by removing the cotter pin from the bolt attaching the tie rod end to the driver's side steering knuckle. Then using either a wrench or a 19mm socket, remove the nut from the tie rod end.
You are using an out of date browser. It may not display this or other websites correctly.
You should upgrade or use an alternative browser.
You should upgrade or use an alternative browser.
Jason4x4's 2006 TJ project
- Thread starter Jason4x4
- Start date
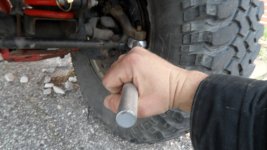
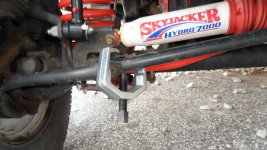
Next, you need to pop the tie rod off the steering knuckle. If you have a puller you can fit in there, now would be the time to use it. My puller wouldn't fit in the tight space between the wheel and the brake, so I used a pickle fork. Place it like so and give it a few hard whacks with a hammer to break the ball joint loose.
Attachments
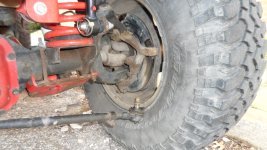
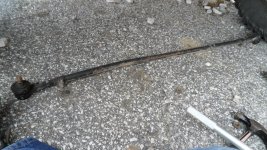
Now we need to move to the other end of the tie rod (where it attaches to the drag link). Pretty much the same procedure here: remove the cotter pin, use a 19mm socket and breaker bar or similar to break the nut loose and remove the nut. Here I was able to get a puller over the ball joint to pop it loose that way. A puller would be easier but you can use the pickle fork here too. Just be aware that if you plan on reusing the tie rod ends to be careful with the pickle fork because you can easily damage the rod ends. I'm just planning on using them as spares to get me home from the trail in case of breakage, so I'm not too worried about it, but the puller is better if you have one and it'll fit. Anyway, once you pop the ball joint off of the drag link the whole tie rod comes off.
Attachments
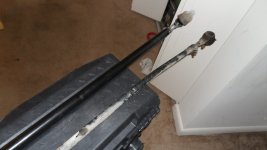
Now comes the time consuming part. You need to try and measure the distance from the stud on the ball joint to the end of the tie rod on the old tie rod so you can set the new tie rod ends up the same. This can be kind of time consuming, but try to make careful measurements and set the length of the rod ends accordingly. Then tighten the lock nuts. At this point, it started raining so I was working quickly on the install so I don't have any pictures, but here is the procedure:
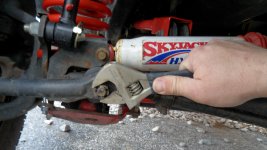
Once you have the rod ends adjusted and the lock nuts tightened, install the zerk fittings if not already installed on the rod ends. Then head back under the Jeep. Start with the end that connects the tie rod to the drag link. The stud should easily come through the drag link with enough room to start the nut. Loosely install the nut. You will find that when you go to attach the other rod end to the steering knuckle that the stud won't want to come through the knuckle far enough to start the nut on that end - it needs to be kind of pressed in. So what you need to do is get a bottle jack (the stock jack that comes with the Jeep is fine) or a floor jack if you have one handy. Put the jack under the end of the tie rod by the rod end that connects to the steering knuckle. Raise the jack up slowly and make sure the stud goes into the hole in the steering knuckle. Keep jacking the tie rod up until the stud is through the steering knuckle far enough to start the nut. Once both nuts are started, grab a 19mm socket or wrench and tighten both nuts down good. Install new cotter pins to hold everything in place. The final step is to apply grease to the new rod ends. Lastly, you should take the Jeep to have it aligned as you may have gotten the alignment close if you took good measurements, but you most likely will still need to have the alignment adjusted.
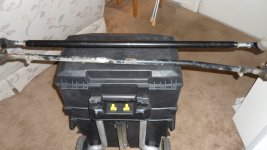
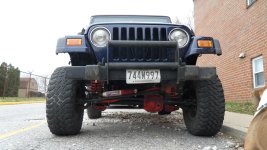
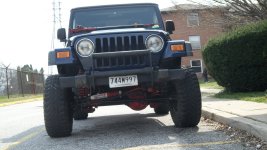
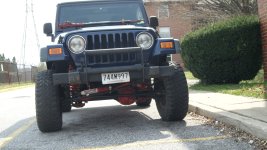
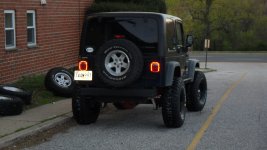
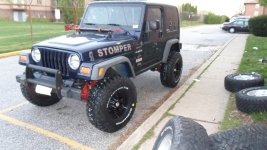
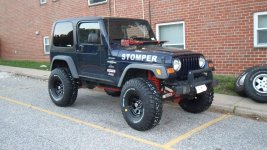
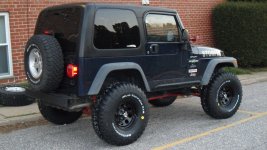
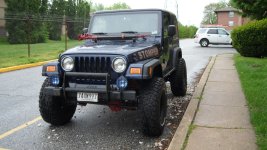
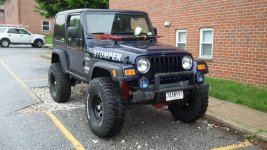
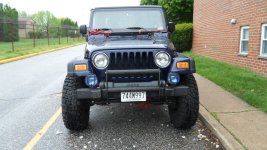
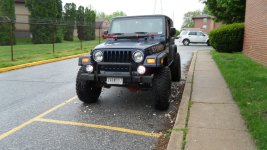
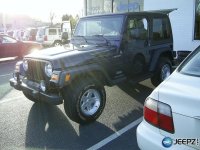
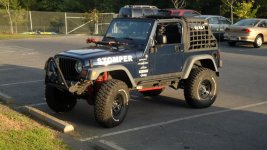
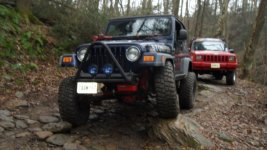
Here are some before and after pictures (alignment coming tomorrow).
Once you have the rod ends adjusted and the lock nuts tightened, install the zerk fittings if not already installed on the rod ends. Then head back under the Jeep. Start with the end that connects the tie rod to the drag link. The stud should easily come through the drag link with enough room to start the nut. Loosely install the nut. You will find that when you go to attach the other rod end to the steering knuckle that the stud won't want to come through the knuckle far enough to start the nut on that end - it needs to be kind of pressed in. So what you need to do is get a bottle jack (the stock jack that comes with the Jeep is fine) or a floor jack if you have one handy. Put the jack under the end of the tie rod by the rod end that connects to the steering knuckle. Raise the jack up slowly and make sure the stud goes into the hole in the steering knuckle. Keep jacking the tie rod up until the stud is through the steering knuckle far enough to start the nut. Once both nuts are started, grab a 19mm socket or wrench and tighten both nuts down good. Install new cotter pins to hold everything in place. The final step is to apply grease to the new rod ends. Lastly, you should take the Jeep to have it aligned as you may have gotten the alignment close if you took good measurements, but you most likely will still need to have the alignment adjusted.
Here are some before and after pictures (alignment coming tomorrow).
Attachments
Jeff Smith
New member
Nice jeep and a cool thread too.
I used to have the factory fog lights on my TJ, until somebody was walking through the parking lot at my apartment complex and apparently decided to break one of them off.
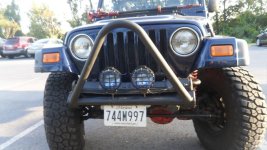
I've been wanting to replace the fog lights. I went to Crazy Ray's junkyard this morning in search of a new factory fog light. Thousands of cars, but only four "Jeeps" (lots of XJ/WJ's, but I'm talking about "Jeep" Jeeps). They had one TJ that had been rolled, it was pretty much stripped clean. Right across from it was a YJ that had what looked like a Renegade body kit on it. In the same general area was a DJ (who knows how it ended up there). Lastly, on the other side of the yard I found a '76 CJ hiding behind some other cars. That was it for Jeeps. So, I decided to go the aftermarket route. They work just as good and look similar, so they work for me.
I've been wanting to replace the fog lights. I went to Crazy Ray's junkyard this morning in search of a new factory fog light. Thousands of cars, but only four "Jeeps" (lots of XJ/WJ's, but I'm talking about "Jeep" Jeeps). They had one TJ that had been rolled, it was pretty much stripped clean. Right across from it was a YJ that had what looked like a Renegade body kit on it. In the same general area was a DJ (who knows how it ended up there). Lastly, on the other side of the yard I found a '76 CJ hiding behind some other cars. That was it for Jeeps. So, I decided to go the aftermarket route. They work just as good and look similar, so they work for me.
Attachments
aThere are a couple of current projects that I'm working on (no pictures to show yet), but for Christmas I got a set of Poison Spyder "Zero" DeFenders from my wife and a set of the Drake "racing style" hood pins. I also have a set of EBC slotted/drilled brake rotors and Yellow Stuff pads sitting at home right now. My wife and I are moving in a couple months (as soon as our taxes are done) so I may not get to do anything with them until spring/summer, but I'll try to do a write up when I get around to installing them. After that, plans are to add a PSC upgraded steering box, and then I might finally get around to adding those OX lockers and upgraded axleshafts I want...by the way, I've pretty much decided to swap in a HP Dana 30 front axle instead as I think with upgraded axleshafts/u-joints it will hold up to the type of wheeling I do without any issues.
Oh, forgot one more thing: After a wheelin' trip to the Anthracite Off-road Adventure Area back in September, I decided I was tired of trying to find a place to air up after I was done wheelin', so I started shopping for an air compressor. I found a comparison on another off-road site that gave very positive reviews of the SuperFlow MV-50 - appears to be a relabelled Viair, as far as I can tell. Anyway, I found one on Amazon for $50, and mounted it in the back of the TJ and hardwired it to the Jeep. I'll post some pictures of that installation soon.
I upgraded to the EBC rotors (non drilled) and yellow stuff pads and the difference was amazing. I can lockup my 33s if I really stand on it now. Definitely worth doing.
Don't forget to post pictures of the air install.
I also read in another thread that you were looking into a SYE - did you end up doing that?
Don't forget to post pictures of the air install.
I also read in another thread that you were looking into a SYE - did you end up doing that?
I upgraded to the EBC rotors (non drilled) and yellow stuff pads and the difference was amazing. I can lockup my 33s if I really stand on it now. Definitely worth doing.
Don't forget to post pictures of the air install.
I also read in another thread that you were looking into a SYE - did you end up doing that?
I'll try to get pictures of the air install tomorrow. I thought I mentioned it earlier in this thread, but yes I did get the PORC SYE kit recommended in the other thread. I haven't had any issues with it except that the seal that came with the kit that goes over the new end of the transfer case that comes with the kit (sorry, don't know the name of it) was a cheap POS made in China and it leaked bad after only about 3000 miles. Pulled it apart and put in a good ol' Made-in-the-USA seal and haven't had any problems with it since (approximately 10kmiles).
NMTJeepers
New member
Two questions:
1. How did air intake improve your performance? Worth it?
2. What size/brand lift do you run?
1. How did air intake improve your performance? Worth it?
2. What size/brand lift do you run?
1) You can definitely notice a difference with the intake. It's not super huge but I'd say it's definitely a worthwhile mod. It would be more noticeable with an aftermarket exhaust system/header to maximize airflow.
2) It's a combination of a bunch of different parts (i.e. it's not an off-the-shelf kit). I explained it in more detail in the first couple posts of thread, but in short it's Skyjacker springs and shocks, Rough Country X-Flex control arms upper and lower, front and rear, Rough Country adjustable front track bar, JKS adjustable rear track bar, JKS Quicker swaybar disconnects, JKS 1.25" body lift, Currie 1" motor mounts, PORC SYE kit, Quigley rear driveshaft, and a UCF extra clearance belly pan (steel).
Long story short, I bought an off-the-shelf economy Skyjacker 4" kit and regretted the decision before I installed anything, so I sold the control arms that came with the kit and made a list of what I thought I'd need to add to make it a respectable suspension. I am very happy with how it has turned out.
Overdue update: On Board Air Install
Well this is way overdue. I've been wheelin' my TJ pretty much ever since I bought it brand new in 2006. I'm fortunate in that I live within a couple hours of some of the best public four-wheeling on the east coast - namely Paragon Adventure Park (before it closed), Rausch Creek Off Road Park, and the new Anthracite Off-Road Adventure Area (if you haven't heard of it before, you will know about it soon enough). The good thing about the parks is that they usually will have an air compressor you can use to air up your tires at the end of the day. Unfortunately a few places I wheel at (Trails Rd, PA) and the yet-to-open Anthracite park don't have any compressors or gas stations nearby to air up at. I had a chance to wheel at Anthracite last fall and at the end of the day I had to drive 15 miles up the highway with my tires at 8psi to find a gas station to air up at. It was at this point that I decided I needed to install an on board air compressor so I could air up my own tires without worry.
A few days later I was at the local auto parts store picking up a few things when I noticed some portable air compressors sitting on the shelf that were relatively cheap ($40-50). I almost bought one, but I wondered how well they really worked. I decided to go home and do some research. I hit the internet and came across several comparison tests such as this:
Tire Inflator Comparison
I was impressed by the reviews I found for the SuperFlow MV50 compressor and it's low price point. I ended up picking one up online for about $50 (I tried and failed to find one for the $25 mentioned in the above review).
Similar threads
- Replies
- 0
- Views
- 13K
- Replies
- 1
- Views
- 9K
- Replies
- 2
- Views
- 5K