1983 cj5 restoration


Day 7

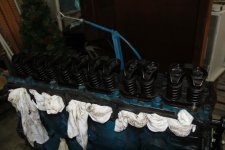
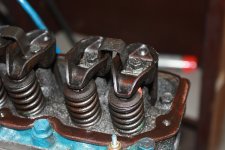
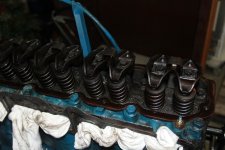
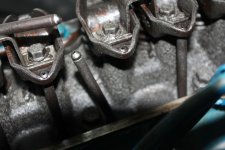
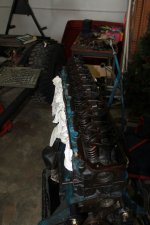
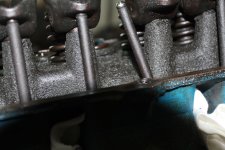
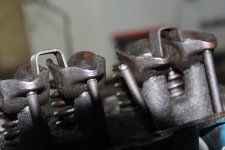
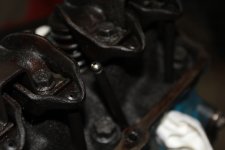
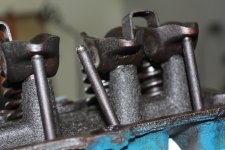
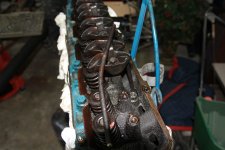
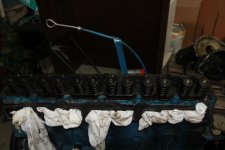
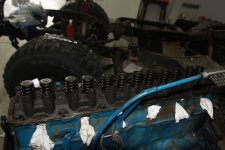
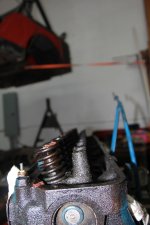
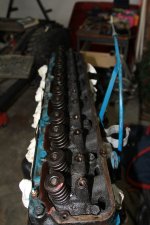
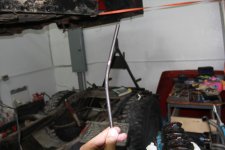
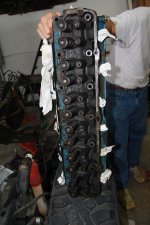
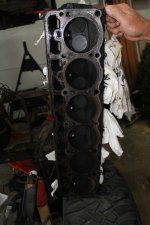
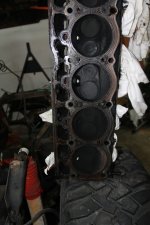
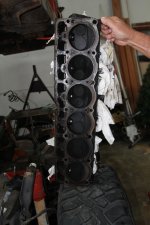
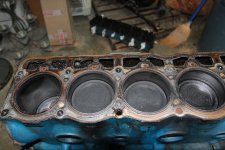
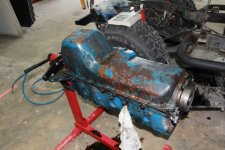
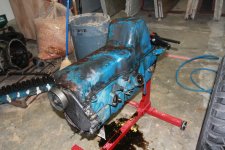
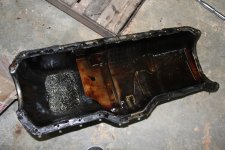
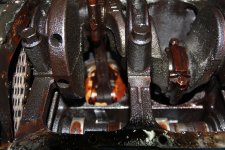
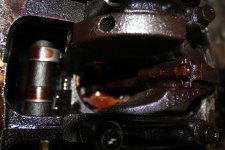
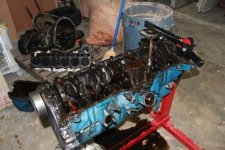
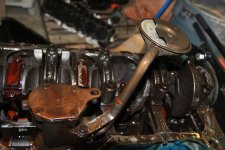
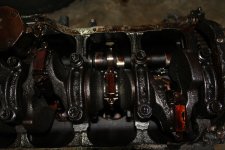
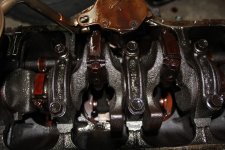
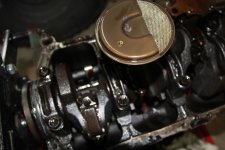
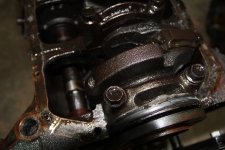
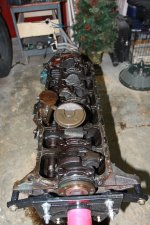
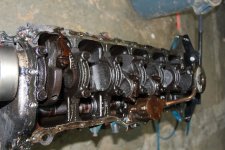
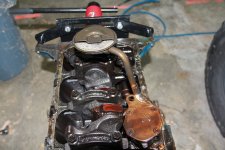
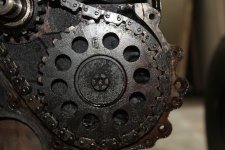
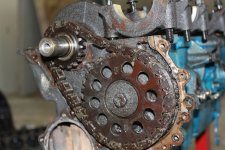
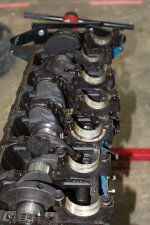
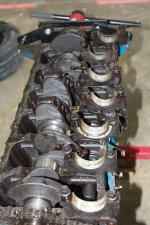
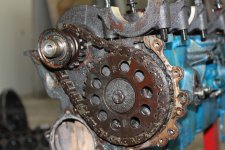
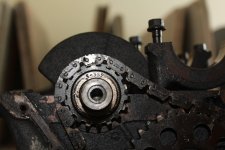
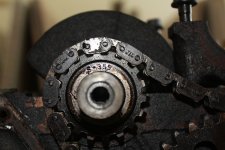
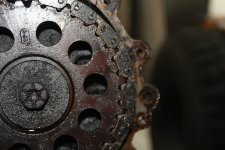
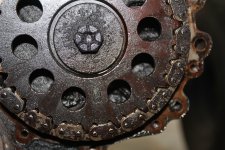
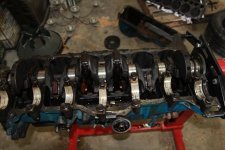
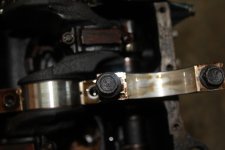
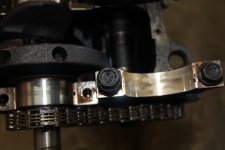
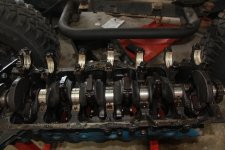
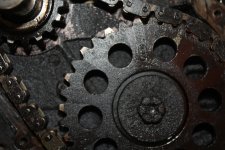
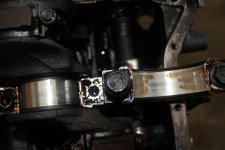
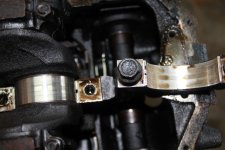
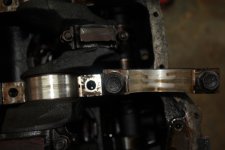
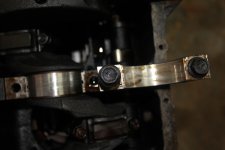
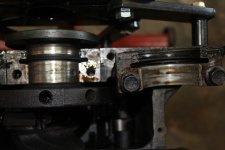
Today was Day 7, I had the engine up on the stand, I removed the valve cover, the push rods, exposed the piston heads, and removed the oil pan to reveal the cam shaft and pistons underneath. Now when i bought the jeep there was an odd clanking noise and the engine wasnt running smoothly. Today I luckly found out the problem, not only did they not put the correct starter which ate up the starter and the flywheel, but two of the push rods were not even connected to the valves and one of the rods was completely bent. Here are some pictures to show that and of the entire days progress.
 

Attachments

  • IMG_5458.JPG
    IMG_5458.JPG
    382.6 KB · Views: 27
  • IMG_5459.JPG
    IMG_5459.JPG
    461.4 KB · Views: 25
  • IMG_5460.JPG
    IMG_5460.JPG
    462.4 KB · Views: 32
  • IMG_5461.JPG
    IMG_5461.JPG
    410 KB · Views: 26
  • IMG_5457.JPG
    IMG_5457.JPG
    363.5 KB · Views: 28
Day 7 continued

more photos
 

Attachments

  • IMG_5462.JPG
    IMG_5462.JPG
    517.1 KB · Views: 33
  • IMG_5463.JPG
    IMG_5463.JPG
    360 KB · Views: 26
  • IMG_5464.JPG
    IMG_5464.JPG
    260.3 KB · Views: 25
  • IMG_5465.JPG
    IMG_5465.JPG
    497.3 KB · Views: 27
  • IMG_5466.JPG
    IMG_5466.JPG
    422.9 KB · Views: 27
day 7 continued

more photos
 

Attachments

  • IMG_5470.JPG
    IMG_5470.JPG
    338.2 KB · Views: 29
  • IMG_5471.JPG
    IMG_5471.JPG
    388.2 KB · Views: 29
  • IMG_5469.JPG
    IMG_5469.JPG
    415.7 KB · Views: 26
  • IMG_5468.JPG
    IMG_5468.JPG
    415.7 KB · Views: 29
  • IMG_5467.JPG
    IMG_5467.JPG
    297.5 KB · Views: 28

Day 7 continued

Here are more photos
 

Attachments

  • IMG_5472.JPG
    IMG_5472.JPG
    464.9 KB · Views: 34
  • IMG_5473.JPG
    IMG_5473.JPG
    395.9 KB · Views: 24
  • IMG_5474.JPG
    IMG_5474.JPG
    453.7 KB · Views: 29
  • IMG_5475.JPG
    IMG_5475.JPG
    394.1 KB · Views: 29
  • IMG_5476.JPG
    IMG_5476.JPG
    503.6 KB · Views: 25
Day 7 continued

more photos continued
 

Attachments

  • IMG_5477.JPG
    IMG_5477.JPG
    492 KB · Views: 26
  • IMG_5478.JPG
    IMG_5478.JPG
    460.8 KB · Views: 28
  • IMG_5479.JPG
    IMG_5479.JPG
    467.4 KB · Views: 28
  • IMG_5480.JPG
    IMG_5480.JPG
    503.1 KB · Views: 26
  • IMG_5481.JPG
    IMG_5481.JPG
    463.9 KB · Views: 25
Day 7 continued

Even more Photos
 

Attachments

  • IMG_5486.JPG
    IMG_5486.JPG
    568.1 KB · Views: 31
  • IMG_5485.JPG
    IMG_5485.JPG
    522.8 KB · Views: 30
  • IMG_5483.JPG
    IMG_5483.JPG
    470.7 KB · Views: 34
  • IMG_5482.JPG
    IMG_5482.JPG
    513.9 KB · Views: 26
  • IMG_5484.JPG
    IMG_5484.JPG
    469.8 KB · Views: 31

Day 7 continued

More day 7 photos
 

Attachments

  • IMG_5488.JPG
    IMG_5488.JPG
    500.5 KB · Views: 36
  • IMG_5489.JPG
    IMG_5489.JPG
    509.9 KB · Views: 30
  • IMG_5490.JPG
    IMG_5490.JPG
    371.5 KB · Views: 23
  • IMG_5491.JPG
    IMG_5491.JPG
    448.4 KB · Views: 28
  • IMG_5492.JPG
    IMG_5492.JPG
    470.1 KB · Views: 31
Day 7 continued

Day 7 Photos
 

Attachments

  • IMG_5493.JPG
    IMG_5493.JPG
    514.9 KB · Views: 27
  • IMG_5494.JPG
    IMG_5494.JPG
    514.2 KB · Views: 34
  • IMG_5495.JPG
    IMG_5495.JPG
    460.3 KB · Views: 23
  • IMG_5496.JPG
    IMG_5496.JPG
    458.9 KB · Views: 26
Does anyone happen to know of a good machine shop in south florida to get the heads shaved and pistons bored?
 

I'm loving all the photos! You are really tearing into that thing.
 
I'm loving all the photos! You are really tearing into that thing.

Thanks, keep checking in every day, I try to work on it every single day and i try to take lots of pictures, so theres hundreds of more pictures to come. its going to be a very detailed build.
 
I sure appreciate all the hard work and dedication you've got into your jeep , hope the machinist you select does too . I know this jeep will be in better hands now , the previous owner pit this poor jeep through the wringer ! So glad you rescued it from them , poor maintenance and abuse written all over but held up real well considering. A 258 is a warrior . Even the clutch hung on with a hole in the pressure plate from a popped rivet. Man , the stories your going to tell when she's done ! I'm glued to this build ! Like I said , spike tv couldn't shine your shoes !
 

I sure appreciate all the hard work and dedication you've got into your jeep , hope the machinist you select does too . I know this jeep will be in better hands now , the previous owner pit this poor jeep through the wringer ! So glad you rescued it from them , poor maintenance and abuse written all over but held up real well considering. A 258 is a warrior . Even the clutch hung on with a hole in the pressure plate from a popped rivet. Man , the stories your going to tell when she's done ! I'm glued to this build ! Like I said , spike tv couldn't shine your shoes !

Funny thing about the history of this jeep is I bought this jeep off of a 17 year old girl and she owned it for about 2 years and she said she bought it off of a teenage girl that owned it before her.
 
I love to see fearless woman in trucks and jeeps , but I guess we can't expect teens to be faithful to car maintenance , heck , they can't even keep their rooms clean ! And they also say " silly boys , jeeps are for girls ! " at least our girls in our forum take care of their jeeps !
 

What are your plans for the Jeep? Is it going to see any trail use or is it going to be super slick?

Im going to keep the jeep lifted like it was originally and trail ready if i want to but I live in south florida and in the city so Im mostly building it to be as slick and as nice as possible and to the way i like it. I bought it so i can have a an open beach car, I have a mustang now which isnt too bad of a beach car but i wanted another one thats completely open and I love these older jeeps. If it does leave the street it will most likely just be driven on the sand on the beach.
 
Day 8

Hey everyone, here are photos from day 8, i got the shafts out and the pistons and I am now ready to send off the block to be machined, sadly I wont be able to be take pictures while it gets machined so thats one process i wont have documented. I found one more small issue today that could of been adding to the problems. it seemed that on the piston spacing rings that go inbetween the shaft and the piston instead of it being a complete circle one of the halfs of the circle folded into the other one and they were overlapped and started to break down and thin out. I have some pictures of the overlap to show what im talking about.
 

Attachments

  • IMG_5502.JPG
    IMG_5502.JPG
    699.6 KB · Views: 32
  • IMG_5501.JPG
    IMG_5501.JPG
    716.8 KB · Views: 33
  • IMG_5499.JPG
    IMG_5499.JPG
    539.1 KB · Views: 34
  • IMG_5498.JPG
    IMG_5498.JPG
    640.9 KB · Views: 30
  • IMG_5500.JPG
    IMG_5500.JPG
    676.6 KB · Views: 28
Day 8 continued

here are some more photos
 

Attachments

  • IMG_5503.JPG
    IMG_5503.JPG
    505.5 KB · Views: 27
  • IMG_5504.JPG
    IMG_5504.JPG
    584.9 KB · Views: 25
  • IMG_5505.JPG
    IMG_5505.JPG
    561.5 KB · Views: 24
  • IMG_5506.JPG
    IMG_5506.JPG
    698 KB · Views: 29
  • IMG_5507.JPG
    IMG_5507.JPG
    988.4 KB · Views: 30

Day 8 continued

here are more photos
 

Attachments

  • IMG_5509.JPG
    IMG_5509.JPG
    450.8 KB · Views: 33
  • IMG_5512.JPG
    IMG_5512.JPG
    286.9 KB · Views: 25
  • IMG_5511.JPG
    IMG_5511.JPG
    352.4 KB · Views: 25
  • IMG_5510.JPG
    IMG_5510.JPG
    510.1 KB · Views: 27
  • IMG_5508.JPG
    IMG_5508.JPG
    634.5 KB · Views: 31
day 8 continued

More photos
 

Attachments

  • IMG_5513.JPG
    IMG_5513.JPG
    426.7 KB · Views: 23
  • IMG_5514.JPG
    IMG_5514.JPG
    487.7 KB · Views: 28
  • IMG_5515.JPG
    IMG_5515.JPG
    342.2 KB · Views: 27
  • IMG_5516.JPG
    IMG_5516.JPG
    294 KB · Views: 27
  • IMG_5517.JPG
    IMG_5517.JPG
    405.6 KB · Views: 29
Back
Top