You are using an out of date browser. It may not display this or other websites correctly.
You should upgrade or use an alternative browser.
You should upgrade or use an alternative browser.


PoliceMonkey161
New member
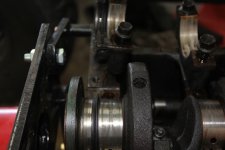
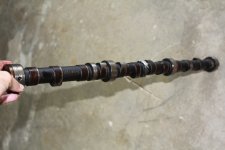
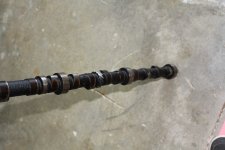
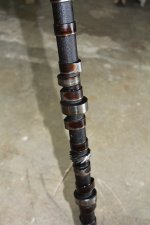
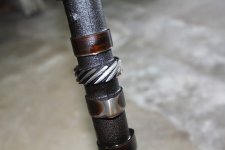
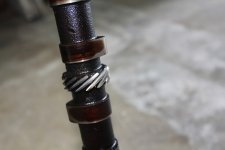
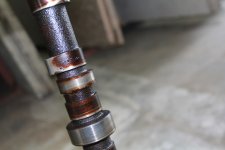
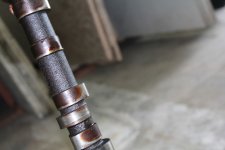
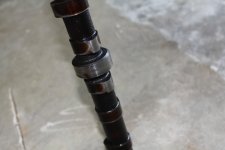
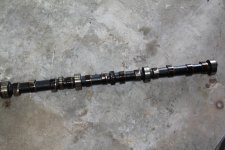
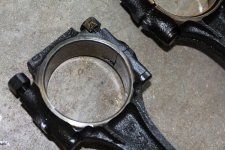
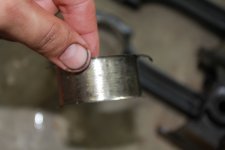
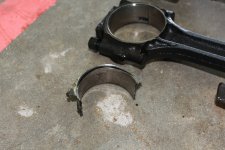
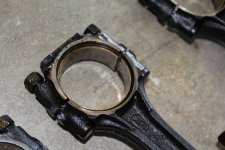
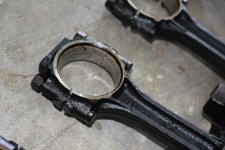
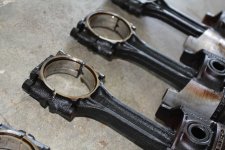
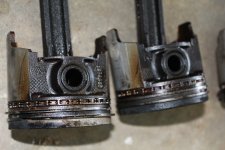
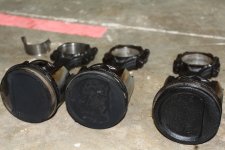
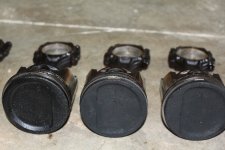
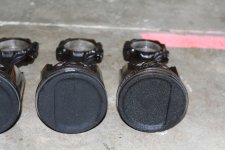
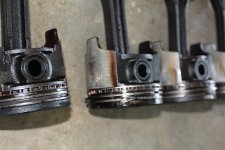
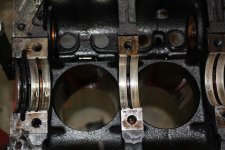
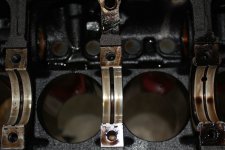
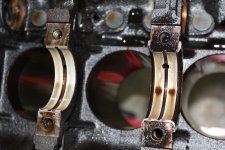
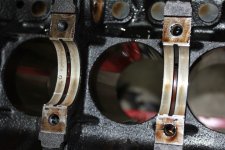
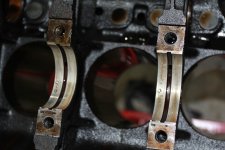
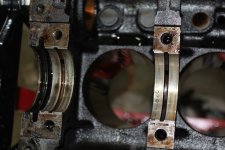
I think you're reffering to the main bearings or the rod bearings? They are worn for sure and based on the other photos, the PO's were not big believers in oil changes. You'll want to send your crank out for machining as well if you have not already done so.
Much like yourself, I'm in the middle of a frame off resto myself. I had a lot of fun rebuilding the 258. Keep up the good work.
Much like yourself, I'm in the middle of a frame off resto myself. I had a lot of fun rebuilding the 258. Keep up the good work.
PoliceMonkey161
New member
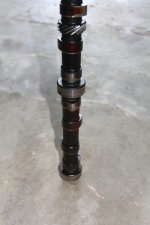
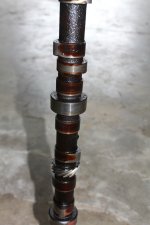
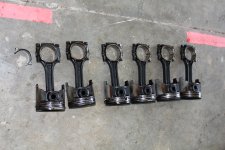
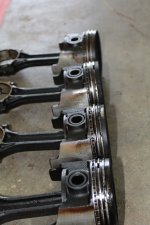
I missing the photos of the pistons, that is rod bearing that's all mangled up. You definitely need the crank shaft checked and it will likely be re-ground. Normally, I'd say to check the piston's wirst pins, connecting rods for trueness, etc, but I'm willing to bet you'll be getting the block over-borad which will require new matching over-borad pistons anyway.
I missing the photos of the pistons, that is rod bearing that's all mangled up. You definitely need the crank shaft checked and it will likely be re-ground. Normally, I'd say to check the piston's wirst pins, connecting rods for trueness, etc, but I'm willing to bet you'll be getting the block over-borad which will require new matching over-borad pistons anyway.
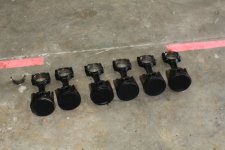
thanks for the advice, Im going to check out your build, your probably a little further ahead of me. I am going to get the block over bored so im going to buy all new pistons to match. the shafts ill look and see wether i want to machine them or just buy new ones.
PoliceMonkey161
New member
thanks for the advice, Im going to check out your build, your probably a little further ahead of me. I am going to get the block over bored so im going to buy all new pistons to match. the shafts ill look and see wether i want to machine them or just buy new ones.
You're going to find that a replacement crank is next to impossible to find, I went through that this past summer. It was faster ( but still costly) to just have mine re-ground.
I may be slightly ahead of you, but that will end this Wednesday. I'm going in for a full rotator cuff surgery. The build is on hold for 12-16 weeks!
If you get lucky and only have to have the crank only polished, please let me know. I have a complete set of standard crank and rod bearings I'll give you ( you pay shipping). I got the wrong size and opened the pack, " non-returnable" at this point.......
THEDIRTYCJ7
New member
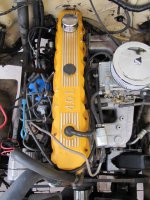
I hope its not to late, but I noticed the Offy intake manifold. What you should consider is doing 4.0 head swap 7120 casting part#. Its what I did and I have a Holley truck avenger on it. Hands down best thing I ever did to the engine after I rebuilt it.
Attachments
Last edited:
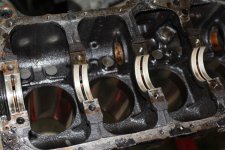
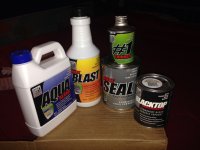
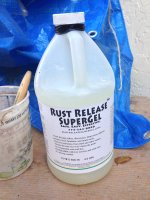
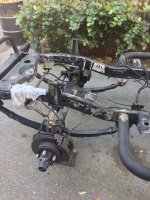
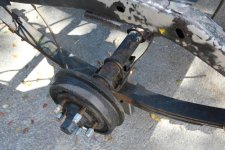
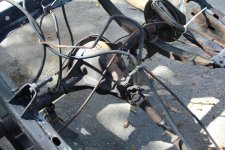
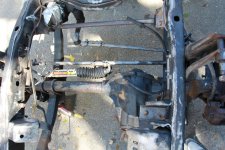
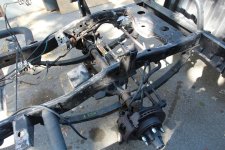
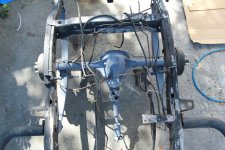
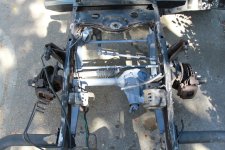
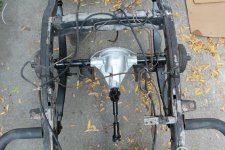
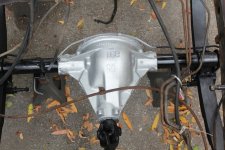
Hey everyone, I finally have the frame almost completely ready for painting. I have been sanding down the frame and pressure cleaning it. I bought a system from KBS coating that is a 4 step system, Step 1 is a clean, Step 2 is a rust remover, Step 3 is two coats of a rust seal and blocker, and Step 4 is a black top coat. I have a picture of the system. The engine block is currently at the machine shop along with the crank shaft and control arms. Im ordering the master rebuild kit and will have pictures of everything when they come in.
Attachments
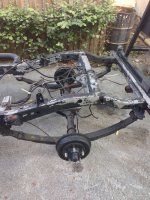
Looking good. Let us know how the KBS works - I've never heard of them myself.
Looking good. Let us know how the KBS works - I've never heard of them myself.
I will def let you know next week and will have pictures for you. All the reviews I've read are great for it. Like the original that everyone uses for rust coating is POR-15, and all the reviews say that POR-15 and KBS are basically the same and probably the same ingredients just different marketing and you actually get more with KBS and its cheaper. KBS offers a lot of products and some really good ones. Check back next weekend and you will see what i think of the product.

greg92jeepxj
Official Supporter
This build is looking sweeter with every picture . That is one solid looking chassis . I don't see any issues. I must admit , this jeep is really coming along so well and your purchase was a perfect restoration waiting to happen. Even though the previous owner(s) tried their hardest to beat the tar out if it , it survived with flying colors . Sure that must have made a good bargaining chip to !
Dragon5126
New member
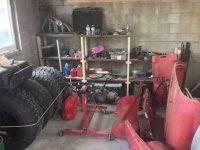
You have no idea how much I want to say you suck because I am so jealous of your workspace! I have done so many rebuilds in such cramped quarters that I never really gave it any thought until I looked at your pics. And then I had to look again at the CJ and I turned even greener... OK I'm giving you heat I admit it, not to be mean, but to let you know That I, like many of us REALLY appreciate what you have there! And the engine, Its the one Chrysler screwed up on, changing it for the 4.0... Had one in my 76 Cherokee S that acted like an 8 but drank like a big 4. If money isn't an overly major issue, and neither is being bone stock there is a lot you can do with that mill to increase torque and decrease fuel consumption, one of which is electronic fuel injection, which is a godsend over the carb. Someone suggested Quadratrac. Don't. I have it. its a fuel guzzler, look for a select-trac setup. It offers the same ability as Quadratrac plus more. first off it is normally 2wd not fill time 4wd ONLY like the quadratrac. It can be set into a 4wd mode identical to the quadratrac, a locked offroad 4wd mode locking front and read drive shafts together as well as a low range setting of this mode. the first 4wd (quadratrac) mode has a viscous clutch between the front and read drive shafts splitting torque, allowing for driving on road or off, even on dry pavement. Its ideal for foul weather especially snow. but for a smaller jeep, on dry roads or even just average wet roads, the extra drive line engaged just sucks more fuel. The select-trac having 2wd removes this issue.
BTW I have the quadratrac in a 94 GC and the select in a 98, the 94 is a 5.2 and the 98 is a 4.0 on the bottom end from a dead stop the 98 in 2wd is ALMOST equal to the 94 up to about the 3 grand mark then the advantage of the 8 shows up. So the quadratrac does suck up a fair amount of performance due to the extra drive line that's engaged and driven
BTW I have the quadratrac in a 94 GC and the select in a 98, the 94 is a 5.2 and the 98 is a 4.0 on the bottom end from a dead stop the 98 in 2wd is ALMOST equal to the 94 up to about the 3 grand mark then the advantage of the 8 shows up. So the quadratrac does suck up a fair amount of performance due to the extra drive line that's engaged and driven
Last edited: