1983 cj5 restoration


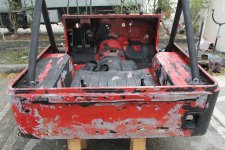
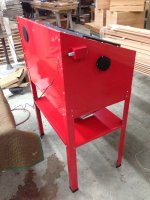
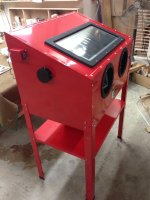
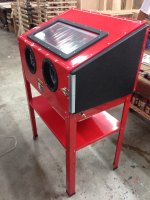
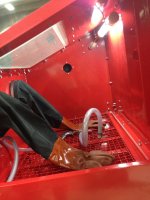
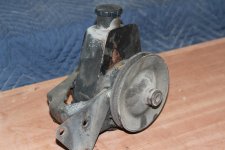
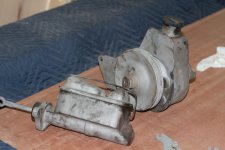
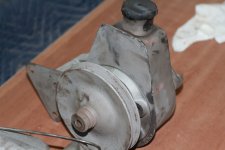
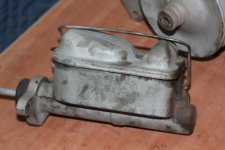
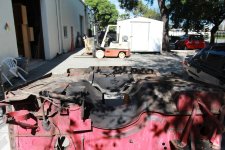
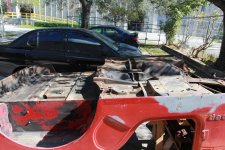
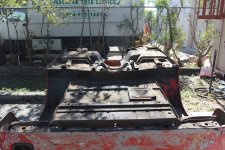
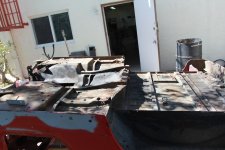
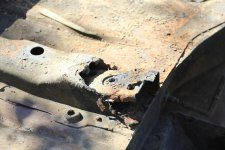
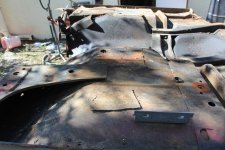
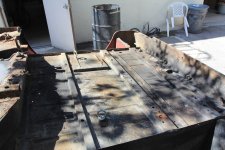
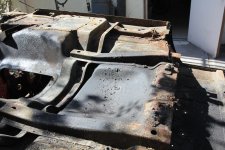
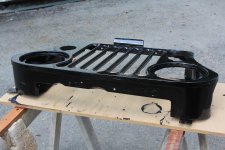
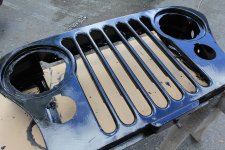
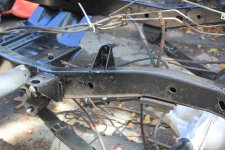
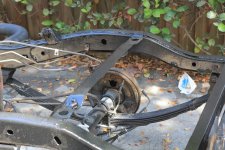
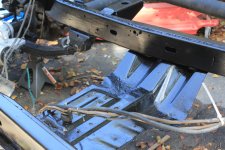
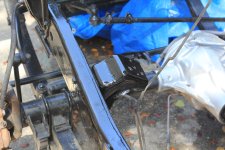
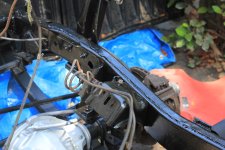
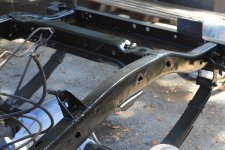
We are just lovin ' this build ! Got a little surface rust here and there , but nothing scary at all , she's solid ! This jeep is a dream ! I'm so glad someone tried to coat it to preserve the body , it worked fairly well . Maybe they did not prep it well enough as it's flaking off , but it helped save the jeep from rusting to dust. I know you'll have everything sparkling in fresh paint soon !
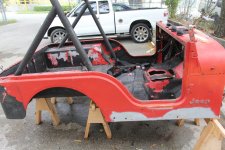
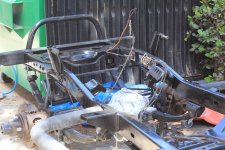
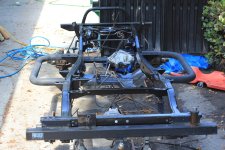
even the wiring harness don't look too bad ! This build is moving at light speed , we better not blink or we'll miss something ! The metal products you have will go a long way to dress any issues with the metal . It'll be fine . You the man mresky !

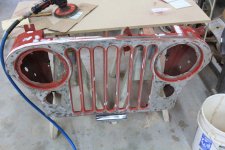
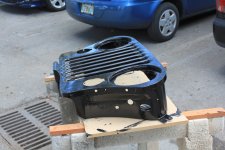
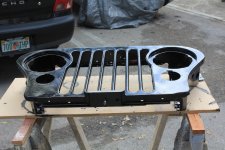
Thanks Greg, ya the person did try to protect it a little but they used really cheap stuff. its like a cheap spray on thin coat. Doesn't really do any rust prevention and peels off really easily once you get it started. Check back tomorrow cause I'm going to take it all off. And then once i prep the metal I'm going to put a rust prevention coating with two layers of that and then a top coat layer of paint, and then the final coats of paint over that. So it will be very rust resistant when I'm done with it. As far as the wire harness ya its in pretty good shape. theres a few wires that aren't needed so i gotta get rid of them and then just all the connectors need cleaning and are a little lose. so gotta fix that.
 
Hey , was just thinking . You may very well finish your project well before your birthday , which means you'll have to get another jeep to finish before your birthday , to make your deadline .
A jeep makes a swell b-day present , but two would make your year ! Woo hoo !
just have to say , your doing a great job !

Another jeep won't be next, what i have lined up after this is a custom cafe racer bike, then a 50's 3100 chevy truck, and then either a 65' or 66' mustang fastback. Those are my next three projects
 

The bike is going to attrack many as so will the 'stang , but I am SO looking forward to the Chevy ! I know of a panel delivery truck that may be if that weight class that would make a great resto ,, just sitting , but has NEVER been up for sale . Probably never will . What a shame , would make an awesome project . Probably get asked about constantly . Been there for ions !
 
Yes having Morris down the road is so nice and convenient. I can just go over there and see everything in person and talk to them and i don't have to wait for shipping, i can take it home with me. And I'm going to trust the rubber lines and if i have to switch them out then i will.

Living up here in the North Woods where we have ample numbers of 'porkypines' where we wheel, braided lines are almost a must because the critters for some insane reason love chewing on brake lines when you are camping out in the woods... You learn real quick to pump up the brakes before starting the rig, when in an area loaded with the quill tails.
 
Porcupines , learned a little of them in Canada . Bear hunting in New Brunswick , the guide was a retired lumberjack. Hated them and squished them with the right front wheel every chance he got when driving us to our stands . The porky ate everything ! Rubber was their favorite .
Ate tires , moulding , wheel well and mud flaps , anything . He had choice words for them .
 

Hi everyone, so today i started removing all the cheap knock off line x that the previous owner spread the entire inside of the tub and rear end. The stuff is on there fairly well but with applying a gel stripper and letting it sit it bubbles right up and comes off. I was worried that maybe they placed the line x on the back of the tub to cover rust but theres actually no rust. Just one tiny little hole, altho theres a little bit of filler in one spot but will be easily be taken cared of. I wasn't able to finish it all in one day so i got some more to go.
 

Attachments

  • IMG_5662.JPG
    IMG_5662.JPG
    510.1 KB · Views: 26
  • IMG_5661.JPG
    IMG_5661.JPG
    436.2 KB · Views: 26
  • IMG_5663.JPG
    IMG_5663.JPG
    422.9 KB · Views: 26
Hey everyone, so I started doing work on my brakes. I got all the springs and pad disassembled and got a rebuild kit and will be putting it all back together. I also got a new sandblasting machine and finished putting that together.
 

Attachments

  • image_1.jpeg
    image_1.jpeg
    977.1 KB · Views: 30
  • image_2.jpeg
    image_2.jpeg
    1.4 MB · Views: 28
  • image_3.jpeg
    image_3.jpeg
    972.1 KB · Views: 30
  • image_4.jpeg
    image_4.jpeg
    1,017.3 KB · Views: 32
  • image_5.jpeg
    image_5.jpeg
    1.1 MB · Views: 23
  • image_6.jpeg
    image_6.jpeg
    1.4 MB · Views: 30
  • image_7.jpeg
    image_7.jpeg
    1 MB · Views: 30
  • image_8.jpeg
    image_8.jpeg
    898.9 KB · Views: 28
  • image_9.jpeg
    image_9.jpeg
    1.1 MB · Views: 28
  • image_10.jpeg
    image_10.jpeg
    1 MB · Views: 23
  • image_11.jpeg
    image_11.jpeg
    1 MB · Views: 29
Wow , following your build is now reminding me of a '59 cj5 for sale in the Keys . $5000 , but I cannot get the cash in time and must be sold . Nice clean jeep like yours . Probably just needs a little work and must be fun to drive a classic F head 134 . Got it posted in a thread called " what's wrong with this picture ? " it's red . Gotta love that blasting cabinet !
 
Last edited:

hey everyone, so i played around with the new sandblaster today and the parts came out pretty nice. here they are.
 

Attachments

  • IMG_5679.JPG
    IMG_5679.JPG
    462.4 KB · Views: 27
  • IMG_5680.JPG
    IMG_5680.JPG
    410.7 KB · Views: 24
  • IMG_5677.JPG
    IMG_5677.JPG
    449.7 KB · Views: 29
  • IMG_5676.JPG
    IMG_5676.JPG
    396.6 KB · Views: 28
  • IMG_5678.JPG
    IMG_5678.JPG
    417 KB · Views: 28
  • IMG_5681.JPG
    IMG_5681.JPG
    374.2 KB · Views: 25
  • IMG_5682.JPG
    IMG_5682.JPG
    427.4 KB · Views: 28
  • IMG_5683.JPG
    IMG_5683.JPG
    400.3 KB · Views: 25
  • IMG_5684.JPG
    IMG_5684.JPG
    391.7 KB · Views: 24
  • IMG_5685.JPG
    IMG_5685.JPG
    497.6 KB · Views: 24
  • IMG_5686.JPG
    IMG_5686.JPG
    489.7 KB · Views: 28
  • IMG_5687.JPG
    IMG_5687.JPG
    495.7 KB · Views: 32
Engine rebuild

HI everyone. I finally got the engine back from the machine shop. Mike from Total Engine Concepts in Riviera Beach, FL did an amazing job and he has a great shop. I had everything cleaned, bored, machined, and shaved. Redid the pistons, cam shaft and crank shaft, machined the crankshaft and the control arms, shaved the heads, bored the pistons to .40 I started reassembling and got almost everything done except for the rocker arms and setting the timing. here are some pictures
 

Attachments

  • IMG_5845.jpg
    IMG_5845.jpg
    327.2 KB · Views: 27
  • IMG_5846.jpg
    IMG_5846.jpg
    242.1 KB · Views: 26
  • IMG_5847.jpg
    IMG_5847.jpg
    244.6 KB · Views: 27
  • IMG_5848.jpg
    IMG_5848.jpg
    283.8 KB · Views: 24
  • IMG_5849.jpg
    IMG_5849.jpg
    235.9 KB · Views: 25
  • IMG_5854.jpg
    IMG_5854.jpg
    234.7 KB · Views: 23
  • IMG_5853.jpg
    IMG_5853.jpg
    254 KB · Views: 23
  • IMG_5851.jpg
    IMG_5851.jpg
    268.9 KB · Views: 25
  • IMG_5850.jpg
    IMG_5850.jpg
    254.3 KB · Views: 27
  • IMG_5852.jpg
    IMG_5852.jpg
    254.1 KB · Views: 26
  • IMG_5855.jpg
    IMG_5855.jpg
    215.9 KB · Views: 25
  • IMG_5856.jpg
    IMG_5856.jpg
    246.9 KB · Views: 25
  • IMG_5857.jpg
    IMG_5857.jpg
    256.4 KB · Views: 21
  • IMG_5858.jpg
    IMG_5858.jpg
    210.3 KB · Views: 28
  • IMG_5869.jpg
    IMG_5869.jpg
    254.9 KB · Views: 26
  • IMG_5879.jpg
    IMG_5879.jpg
    319.5 KB · Views: 28
  • IMG_5880.jpg
    IMG_5880.jpg
    223.4 KB · Views: 26
  • IMG_5870.jpg
    IMG_5870.jpg
    270.3 KB · Views: 29

Hey everyone. So I have flipped the tub upside down to prepare it for paint and have started preping all the fenders and hood also for paint. I was able to apply the KBS rust seal to the grill and it came out very nice. I took the pictures in-between coats so theres brush strokes in the picture but its self leveling so theres no brush strokes now that its done. I also have been using this liquid metal to reinforce some of the small spots that have needed it.
 

Attachments

  • IMG_5882.jpg
    IMG_5882.jpg
    392.1 KB · Views: 24
  • IMG_5883.jpg
    IMG_5883.jpg
    424 KB · Views: 30
  • IMG_5884.jpg
    IMG_5884.jpg
    451.4 KB · Views: 28
  • IMG_5885.jpg
    IMG_5885.jpg
    308.5 KB · Views: 23
  • IMG_5886.jpg
    IMG_5886.jpg
    329.9 KB · Views: 21
  • IMG_5888.jpg
    IMG_5888.jpg
    371.5 KB · Views: 23
  • IMG_5891.jpg
    IMG_5891.jpg
    255.4 KB · Views: 25
  • IMG_5890.jpg
    IMG_5890.jpg
    219.7 KB · Views: 23
  • IMG_5889.jpg
    IMG_5889.jpg
    374.8 KB · Views: 26
  • IMG_5887.jpg
    IMG_5887.jpg
    434.5 KB · Views: 34
  • IMG_5892.jpg
    IMG_5892.jpg
    372.7 KB · Views: 30
  • IMG_5893.jpg
    IMG_5893.jpg
    323.4 KB · Views: 23
  • IMG_5894.jpg
    IMG_5894.jpg
    316.6 KB · Views: 21
  • IMG_5895.jpg
    IMG_5895.jpg
    322.6 KB · Views: 26
  • IMG_5896.jpg
    IMG_5896.jpg
    328.1 KB · Views: 25
  • IMG_5897.jpg
    IMG_5897.jpg
    429.4 KB · Views: 22
Well I've got to say your really leaving no stone unturned , but you said you were going all the way on this project . Yeah , needs some TLC but not too long before you got a body ready for that rolling chassis . Got to say to that you really it together , your moving right along and ita all coming together steady . Really appreciate your pictures , makes us feel like we are right there !
 
Interesting .... 1983 cj5 restoration! The images helped me follow the process clearly, it is like I'm there watching. So, what did you do today? I'm interested with the end result of your cj5 restoration project.
 
Hey everyone. so Today I painted my chassis. I used KBS rust steal, which i applied two coats. and then I used their final Black finish paint as the final coat.
 

Attachments

  • IMG_5905.JPG
    IMG_5905.JPG
    442 KB · Views: 28
  • IMG_5906.JPG
    IMG_5906.JPG
    480.6 KB · Views: 25
  • IMG_5907.JPG
    IMG_5907.JPG
    429.9 KB · Views: 26
  • IMG_5908.JPG
    IMG_5908.JPG
    424.6 KB · Views: 27
  • IMG_5909.JPG
    IMG_5909.JPG
    468.6 KB · Views: 22
  • IMG_5910.JPG
    IMG_5910.JPG
    449.9 KB · Views: 27
  • IMG_5911.JPG
    IMG_5911.JPG
    440.3 KB · Views: 31
  • IMG_5912.JPG
    IMG_5912.JPG
    449.2 KB · Views: 25

Looks sharp! Are you going to paint the nerf bars as well?

Yes. I'm thinking about covering everything except the nerf bars and having them Line-x so that way you have more traction when you step up plus the texture wouldn't look bad either.
 
Back
Top