PoliceMonkey161
New member
Topic for today: Replacing the steering shaft Lower CouplingKit and steering column Lower Bearing Set on the CJ models.
At some point, especially on a Jeep that is 25 plus years old, these parts should be replaced. I have done the lower coupling kit a couple of times, but this is my first for the steering shaft bearing. With a little consultation with "69jeepcj", I developed a plan. I should have done this project all at once over the winter when I replace the Lower Coupling. I tore/ripped the dust boot, so it needs replacing again either way. Both kits will run you a total of about $60. I found them at Morris 4X4 and Quadratec.
So let's get started, first remove the intermediate steering shaft (the steering shaft between the two parts we are replacing). This is no easy task and there are several ways of doing it. I prefer to loosen my steering gear box from its mount to give some play or you can go under your dash and loosen the hole steering column (it's a pain in the A** going this route) and the least desired method in my opinion is collapsing the shaft itself by removing the plastic impact pins. If you look closely at the lower end of the thicker partof the shaft (but its actually about in the middle of the whole assembly), you will see two small pin holes. These are plastic pins that hold the two shafts together. Their propose: to break and allow the shaft to collapse into it self during a front impact. They can be drilled out and replaced with nylon screws and nuts found at ACE hardware. I do not care for this method! You will be altering the original safety equipment, but many folks go this route. So for the purpose of this article, I had loosened my gear box.
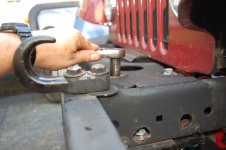
Since I've had my shaft out recently, it slid right out, but you may need to soak the coupling splines with PB blaster beforehand. You will need to completely remove both the upper bolt and the lower bolts at the clamps, just loosening them will do nothing. Each shaft is grooved and the bolt rest in the groove as added safety. Once removed, you will need to wrangle the shaft a bit by grabbing it below the U-joint and pushing and pulling. It will come loosing with some effort! If the lower end is really dry, it may just pop right out.
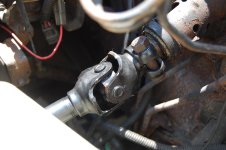
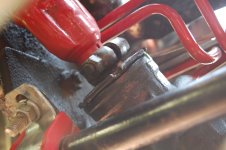
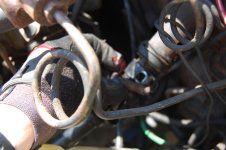
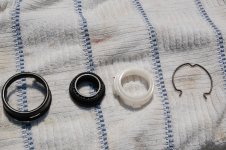
Once removed, I replace the lower steering column bearing set first. It's fairly straight forward (see photo of new parts, this helps me remember the order in which things go). First remove the retaining snap ring and then the end cap, use caution if it's stuck and you use a pair the channel locks to get it free, you do not want to bent the actual steering shaft guide tube itself.
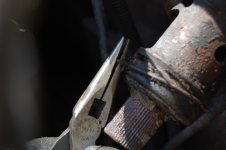
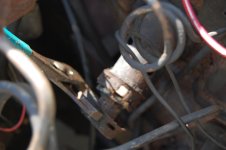
Next, out come the bearing and race. In theory, they would slide off because they are held in place by an o-ring, but there is probably years of rust holding them on. You can use a gear puller (the correct way) or ,if your confident in your abilities, you can use a cutoff wheel and Dermal Tool.
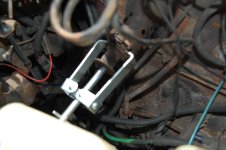
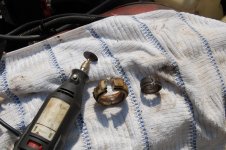
I choose to smooth out the area of the shaft that the bearing rides on with some light oil and a scotch pad. If you are built like an Ape
as I am with long arms, you can hold the pad around the shaft with one hand and reach in to turn the wheel with the other. Next apply some grease to the shaft where the new bearing will be seated.
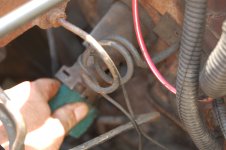
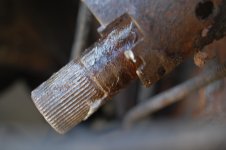
I choose repack the new bearing with more grease, it seemed a bit light on the grease from the manufacture. Now snap the bearing into the race. Slide the bearing/race over the shaft and push forward. You should notice that bearing race has slots that line up with the slots in the steering column. Firmly seat them! Next install your new end cap, you may need to use a small hammer to gently tap it on squarely. This also has slots that line up, but if you're off a little, just use a small screw driver to line them up. Lastly, replace snap ring and make sure that it is seated.
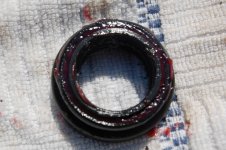
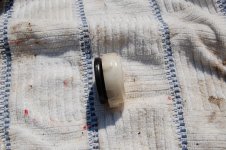
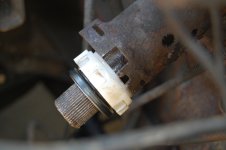
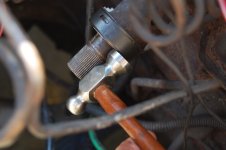
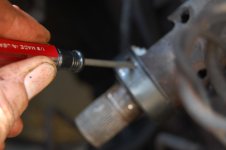
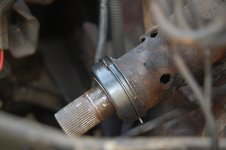
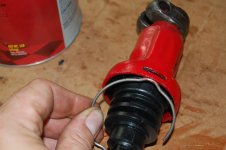
Next, rebuilding the gear coupling. First remove the split ring at the top of the boot, just use pliers to open it and slide it forward. Next, pry out the internal snap ring holding the boot to the coupling. You will likely be replacing the boots, so just cut it off.
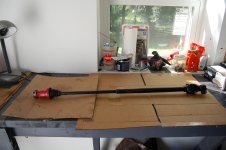
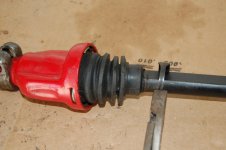
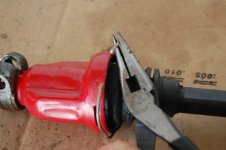
Pulling the assembly apart, it may be full of grease or it may be dried out. Depending if you bought the whole kit or separate pieces lay out your parts and if reusing old parts, clean them out.
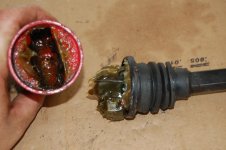
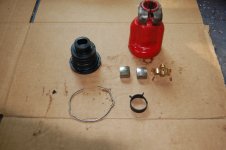
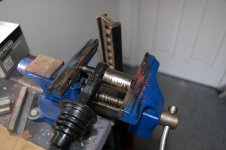
Pull the two nuts of the end of the shaft. Mine came off with a pair of pliers and some pulling. Next we need to move the drift pin to one side, do not fully remove it! It's a pain in the A** to get back in! I used the vise and socket method to move the pin over.
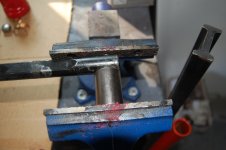
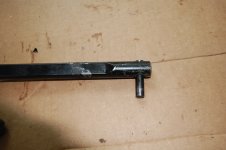
Now take your new boot and turn/fold it inside out. Put a little grease around the inside of the small hole and all around the end of the shaft/pin area. Before installing the new boot, put your upper clamp ring on the shaft, you will need to open it with pliers and wrangling over the pin. Next gently start working your inside-out boot over the shaft and pin (TRICK: if it's being stubborn and not stretching, use a hair drier to warm it up). Once it's on, un-invert the boot.
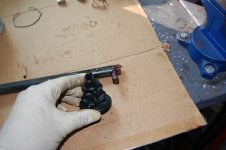
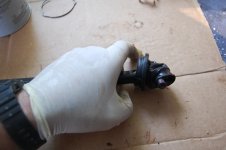
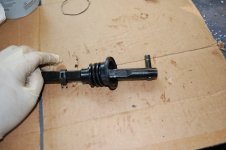
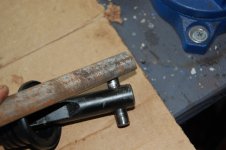
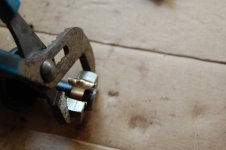
You can now re-center the shaft pin and remove any rough spots or burring with a file. Now press (if necessary) the new square guides (nut looking things) onto the pins. They should move freely, but not so loose they just fall off. Back them out just a little to install the pre-load/retaining clip. then squeeze them on tight with pliers.
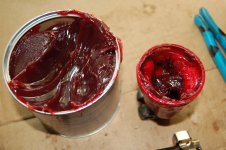
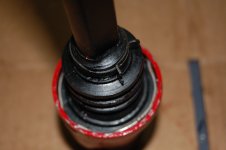
Load up the inside bottom of the gear coupling with grease. Insert the shaft (gently guiding it into its slots) down into the coupling. Top off the coupling with grease. Slide the boot down on top and insert the internal snap ring (start by lining up the notch in one hole with the bend in the ring and work your way around). Now slide the top snap/lock ring over the top of the boot.
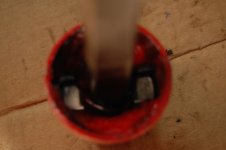
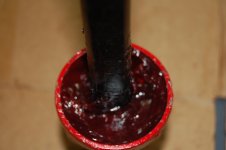
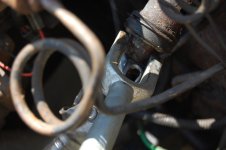
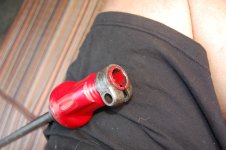
As you noticed while removing the shaft, it has very specific notches that must be lined up in order for it to go back together. This part is time consuming, but take your time. I like to start at the bottom and work upwards. So guide your rebuilt shaft from the under the Jeep towards the firewall avoiding any hoses or wires etc. The coupling gear on the steeering gear box has a flat spot on it which matches the coupling. In my photo, the solid red paint on the inside of the coupling is that flat spot. This end is not so much groove sensitive, just match up the flat spots. Do not re-install your bolt yet.
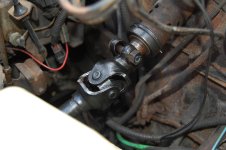
Next is the upper end. I like to rotate the intermedate shaft and the steering wheel shaft so both bolt grooves are upwards and I can see what is lining up. You can be a spline or two off, but not much more because your bolt will not go back in! This will take some wrangling to reassemble. Once everything is slid into place, we now need to tighten down all our bots including the steering gear box! Remember loctite on these bolts, but not on the splines. Use may want to put some light oil into your U-joint while your at it.

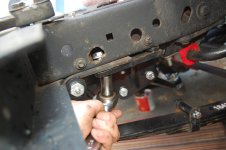
If any part of this assembly fails during driving, it will be catastrophic, so recheck all your connections....PLEASE!
At some point, especially on a Jeep that is 25 plus years old, these parts should be replaced. I have done the lower coupling kit a couple of times, but this is my first for the steering shaft bearing. With a little consultation with "69jeepcj", I developed a plan. I should have done this project all at once over the winter when I replace the Lower Coupling. I tore/ripped the dust boot, so it needs replacing again either way. Both kits will run you a total of about $60. I found them at Morris 4X4 and Quadratec.
So let's get started, first remove the intermediate steering shaft (the steering shaft between the two parts we are replacing). This is no easy task and there are several ways of doing it. I prefer to loosen my steering gear box from its mount to give some play or you can go under your dash and loosen the hole steering column (it's a pain in the A** going this route) and the least desired method in my opinion is collapsing the shaft itself by removing the plastic impact pins. If you look closely at the lower end of the thicker partof the shaft (but its actually about in the middle of the whole assembly), you will see two small pin holes. These are plastic pins that hold the two shafts together. Their propose: to break and allow the shaft to collapse into it self during a front impact. They can be drilled out and replaced with nylon screws and nuts found at ACE hardware. I do not care for this method! You will be altering the original safety equipment, but many folks go this route. So for the purpose of this article, I had loosened my gear box.

Since I've had my shaft out recently, it slid right out, but you may need to soak the coupling splines with PB blaster beforehand. You will need to completely remove both the upper bolt and the lower bolts at the clamps, just loosening them will do nothing. Each shaft is grooved and the bolt rest in the groove as added safety. Once removed, you will need to wrangle the shaft a bit by grabbing it below the U-joint and pushing and pulling. It will come loosing with some effort! If the lower end is really dry, it may just pop right out.


Once removed, I replace the lower steering column bearing set first. It's fairly straight forward (see photo of new parts, this helps me remember the order in which things go). First remove the retaining snap ring and then the end cap, use caution if it's stuck and you use a pair the channel locks to get it free, you do not want to bent the actual steering shaft guide tube itself.


Next, out come the bearing and race. In theory, they would slide off because they are held in place by an o-ring, but there is probably years of rust holding them on. You can use a gear puller (the correct way) or ,if your confident in your abilities, you can use a cutoff wheel and Dermal Tool.


I choose to smooth out the area of the shaft that the bearing rides on with some light oil and a scotch pad. If you are built like an Ape
as I am with long arms, you can hold the pad around the shaft with one hand and reach in to turn the wheel with the other. Next apply some grease to the shaft where the new bearing will be seated.


I choose repack the new bearing with more grease, it seemed a bit light on the grease from the manufacture. Now snap the bearing into the race. Slide the bearing/race over the shaft and push forward. You should notice that bearing race has slots that line up with the slots in the steering column. Firmly seat them! Next install your new end cap, you may need to use a small hammer to gently tap it on squarely. This also has slots that line up, but if you're off a little, just use a small screw driver to line them up. Lastly, replace snap ring and make sure that it is seated.


Next, rebuilding the gear coupling. First remove the split ring at the top of the boot, just use pliers to open it and slide it forward. Next, pry out the internal snap ring holding the boot to the coupling. You will likely be replacing the boots, so just cut it off.


Pulling the assembly apart, it may be full of grease or it may be dried out. Depending if you bought the whole kit or separate pieces lay out your parts and if reusing old parts, clean them out.


Pull the two nuts of the end of the shaft. Mine came off with a pair of pliers and some pulling. Next we need to move the drift pin to one side, do not fully remove it! It's a pain in the A** to get back in! I used the vise and socket method to move the pin over.


Now take your new boot and turn/fold it inside out. Put a little grease around the inside of the small hole and all around the end of the shaft/pin area. Before installing the new boot, put your upper clamp ring on the shaft, you will need to open it with pliers and wrangling over the pin. Next gently start working your inside-out boot over the shaft and pin (TRICK: if it's being stubborn and not stretching, use a hair drier to warm it up). Once it's on, un-invert the boot.


You can now re-center the shaft pin and remove any rough spots or burring with a file. Now press (if necessary) the new square guides (nut looking things) onto the pins. They should move freely, but not so loose they just fall off. Back them out just a little to install the pre-load/retaining clip. then squeeze them on tight with pliers.


Load up the inside bottom of the gear coupling with grease. Insert the shaft (gently guiding it into its slots) down into the coupling. Top off the coupling with grease. Slide the boot down on top and insert the internal snap ring (start by lining up the notch in one hole with the bend in the ring and work your way around). Now slide the top snap/lock ring over the top of the boot.


As you noticed while removing the shaft, it has very specific notches that must be lined up in order for it to go back together. This part is time consuming, but take your time. I like to start at the bottom and work upwards. So guide your rebuilt shaft from the under the Jeep towards the firewall avoiding any hoses or wires etc. The coupling gear on the steeering gear box has a flat spot on it which matches the coupling. In my photo, the solid red paint on the inside of the coupling is that flat spot. This end is not so much groove sensitive, just match up the flat spots. Do not re-install your bolt yet.

Next is the upper end. I like to rotate the intermedate shaft and the steering wheel shaft so both bolt grooves are upwards and I can see what is lining up. You can be a spline or two off, but not much more because your bolt will not go back in! This will take some wrangling to reassemble. Once everything is slid into place, we now need to tighten down all our bots including the steering gear box! Remember loctite on these bolts, but not on the splines. Use may want to put some light oil into your U-joint while your at it.


If any part of this assembly fails during driving, it will be catastrophic, so recheck all your connections....PLEASE!
Last edited:
