-
04-20-2008, 08:02 PM #1
Subwoofer inside of a Jeep Wrangler rear seat
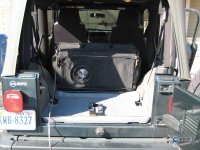
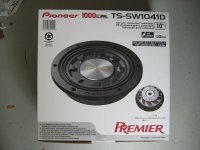
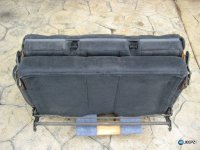
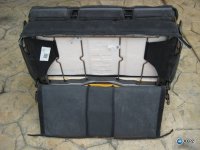
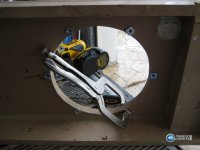
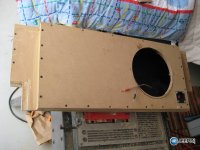
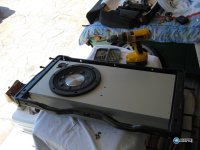
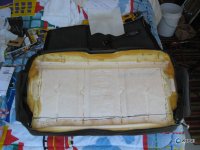
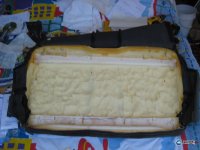
After a year of listening to the stock speakers in my 2005 Jeep Wrangler I was ready for an upgrade. At one point I had installed a sub box behind my rear seat, but this used up the only storage space in my Jeep. After a little thought, and some internet research I found a guy who had installed a subwoofer inside of his rear seat. I decided that was for me.
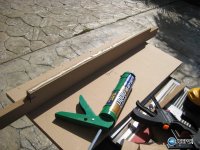
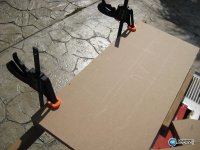
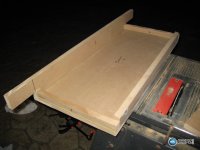
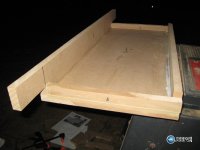
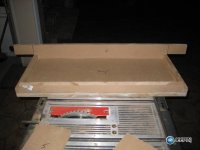
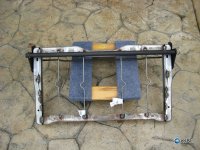
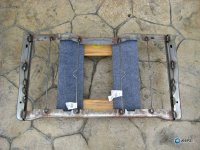
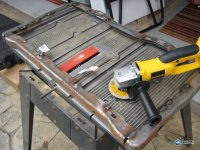
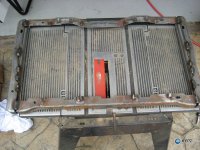
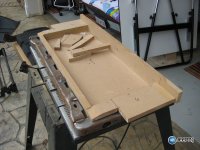
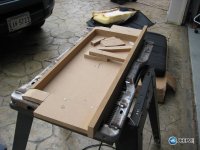
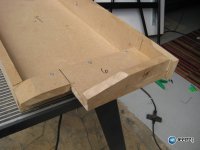
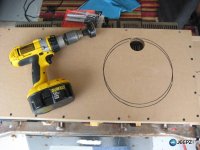
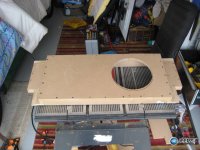
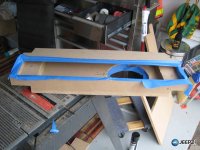
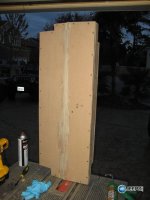
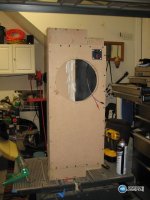
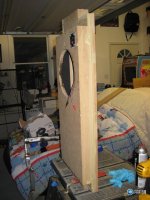
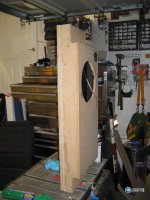
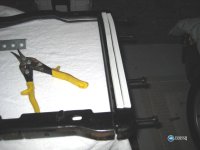
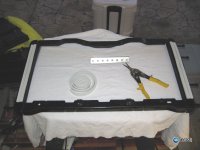
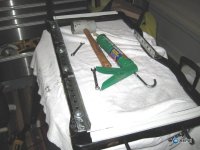
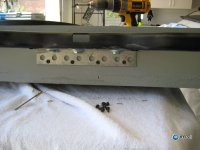
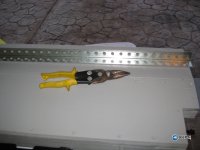
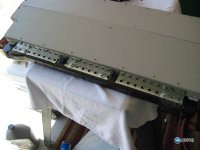
This project took me several weekends to complete, as there is a lot of waiting for glue or paint to dry. The most difficult part for me was the woodworking, as my skills are lacking in this area.
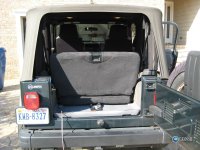
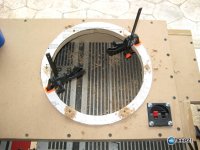
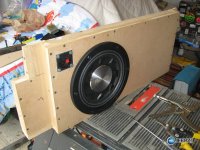
I'm amazed at the final product. This box is better than I would have ever expected, and had no rattles at all. The down firing subwoofer is nice, as you don't have a speaker pointed directly at you drowning out the other speakers. The only negative I've found is that I've added about 25 lbs to an already heavy backseat, so removal is difficult. If you're into stereos, and don't want to compromise on storage space, then this is for you
Here's a video of the finished product:
Last edited by TerryMason; 03-14-2018 at 09:39 AM.
My 2005 Wrangler Build Thread
“He who is without oil shall throw the first rod.” -Compressions 8.7:1
-
04-20-2008, 08:03 PM Thread Starter #2
After photos
After photos
Last edited by TerryMason; 04-21-2008 at 10:46 PM.
-
04-20-2008, 08:03 PM Thread Starter #3
Re: Subwoofer inside of a Jeep Wrangler rear seat
Parts list
2 24x48 sheets of 3/4 MDF (medium density fiberboard)
2 tubes of Liquid Nails
1 can black spray paint
1 pint of paint for the outside of box
1 box of wood screws
1 can of rubberized undercoating / sound deadener
1 48" L bracket
1 terminal connector (best buy)
1 subwoofer (I used the Pioneer TS-SW1041D)
1 amplifier
8 Tee-nuts and bolts (purchased at Lowes)
Tool List
Grinder
Caulk gun
Drill, drill bits, and hole saw.
Several clamps
Saw (table saw makes things much easier)
Snips to cut L bracket (step 18)
Utility knifeLast edited by TerryMason; 04-01-2010 at 09:09 AM.
-
04-20-2008, 09:09 PM Thread Starter #4
Re: Subwoofer inside of a Jeep Wrangler rear seat
First, you'll need to begin by cutting out the necessary pieces. This is about the toughest part of the whole process. You can find the cut sheet at Sirgcal's website
Once the pieces are cut You'll want to start assembly. I found the easiest way to assemble these pieces was to put some liquid nails onto one piece, then clamp the two pieces together. I would then drill a pilot hole, and use the counter sink bit to keep the screw head flush or slightly in-set into the wood (photo 3). Finally, I would screw the pieces together.Last edited by TerryMason; 04-22-2008 at 08:56 AM.
-
04-20-2008, 09:19 PM Thread Starter #5
Initial box
This is the bottom of the box, where the subwoofer will be mounted. Once you have this bottom complete, we'll be able to test fit it into the seat frame
Last edited by TerryMason; 04-22-2008 at 08:54 AM.
-
04-20-2008, 09:27 PM Thread Starter #6
Preparing the seat
I was nervous about taking on this project - cutting up my back seat beyond repair, so I purchased another back seat for $75 from craigslist. In retrospect this probably wasn't necessary, as the project isn't that bad, but if I ever sell my Jeep, I'll put this back seat in the next one.
Here is a photo of the donor seat, and the zipper that you need to unzip to get to the internals.
-
04-20-2008, 09:27 PM Thread Starter #7
Remove the internals
Now, you'll need to take the internals of the seat out (no big deal here), and unbolt the hardware the connects to the floor
-
04-20-2008, 09:27 PM Thread Starter #8
Grinding the day away
Now, with your trusty grinder, remove the supports from the frame, grinding them down flush.
-
04-20-2008, 09:27 PM Thread Starter #9
Adding the sides
This step involves alot of glue and positioning. The idea is to add the sides or wings that will support most of the weight of the box. These wings will go over the frame and support the weight of the passenger.
You can see in the photos how the box fits into the seat frame.Last edited by TerryMason; 04-22-2008 at 08:55 AM.
-
04-20-2008, 09:29 PM Thread Starter #10
Adding to the box
Another piece on the side
-
04-20-2008, 09:56 PM Thread Starter #11
Cutting the hole for the subwoofer
Now, using the cardboard cutout included with your sub, trace the cutout and drill holes.
Use a hole saw to start the main the main sub cutout, as well as installing your terminals.
-
04-20-2008, 10:08 PM Thread Starter #12
Test fitting
Using a pair of vice grips, I pressed the Tee-nuts into the speaker mounts. It's a good idea to put some glue on the Tee-nut backs before pressing them in. It can be a real bear to get them into the MDF. I was then able to test fit the subwoofer into the cutout.
I would suggest that you use these tee nuts instead of screws, mainly because they are removeable (you can take your sub out if you need to). Remember that your box will experiance some significant pressure, and a screw may not hold.Last edited by TerryMason; 04-22-2008 at 10:07 AM.
-
04-21-2008, 10:12 PM Thread Starter #13
Soundproofing
Once the bottom, side, and one half of the top are attached, and there is only one panel left, it's time for some sound proofing. I went over each joint with liquid nails again to make sure that it's airtight, then I shot the box liberally with rubberized undercoating.
-
04-21-2008, 10:14 PM Thread Starter #14
Final panel added
After the undercoating had dried, I attached the final top panel. Here you can see the final construction of the box.
-
04-21-2008, 10:18 PM Thread Starter #15
Bracing
With the final panel on, I was able to add the brace into the center of the box (inserted through the sub hole). This brace allows your hefty uncle to sit in the back seat, without crushing the box. It also keeps the force of the sub from expanding the box. The second shot is another round of undercoating after I had braced the box.
-
04-21-2008, 10:24 PM Thread Starter #16
Re: Subwoofer inside of a Jeep Wrangler rear seat
After getting the box together, I gave it two good coats of a waterproof outdoor paint. I'm sure this box will see water, so I wanted it to be well protected.
-
04-21-2008, 11:06 PM Thread Starter #17
Weather stripping
In order to keep the frame and speaker box from rattling, I added some weather stripping.
-
04-21-2008, 11:10 PM Thread Starter #18
Attaching to the frame
Now you'll need to attach the box to the frame. I used an L bracket, some more liquid nails (is there anything this stuff can't do?), some nuts and bolts, and more screws.
-
04-21-2008, 11:14 PM Thread Starter #19
Mounted
Here is the box, mounted inside the frame
-
04-21-2008, 11:20 PM Thread Starter #20
Removing the foam
I test fitted the foam cushion over the box, and used a permanent marker to outline the areas that I needed to remove. Then, just take a utility knife and cut the foam into squares and pull it out with your hands. This part was much easier than I had anticipated. I did mess up once, and just glued in some foam my my pile on the floor.
Before, during, and after photos
Similar Threads
-
Jeep trivia time
By TwistedCU in forum General ChatReplies: 52Last Post: 11-30-2006, 04:21 PM -
1993 Jeep Wrangler Full Part Out 4.0L
By psukydd in forum Items for Sale, Trade, or Give AwayReplies: 22Last Post: 10-09-2006, 09:39 PM -
TONS of Jeep and 4x4 stuff, CJ7, postal Jeep, Cherokee
By GaryMB in forum Items for Sale, Trade, or Give AwayReplies: 10Last Post: 10-15-2005, 09:35 PM -
What I didn't do July 4th weekend Or Why I replaced my winch
By cewtwo in forum General ChatReplies: 14Last Post: 07-27-2005, 05:31 PM -
SOLD!! JEEP WRANGLER Upper Half Doors (TJ OEM NEW) - ATLANTA
By jtshipp in forum Items for Sale, Trade, or Give AwayReplies: 0Last Post: 03-27-2005, 09:30 AM