75 cj5

Shewilly

New member
My CJ has been a living nitemare since the day I brought it home. So far, every repair or upgrade has involved total rebuild, or replacement of every part, bolt, wire etc. Much more than I thought I signed up for.
The last couple yrs I have gained a little headway, so I thought I might document and share.
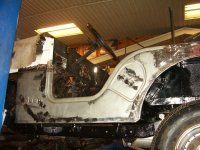
I was pretty lucky when I found my fab guy. He repairs choo-choos for GE so when it came to replacing (just about EVERY) body panel, he fabbed gussets, floor supports, painted the frame and undercarriage with locomotive paint, etc. Needless to say, I am a much happier camper than I was earlier in this rebuild.
Anyway, time for some pics...
 

Attachments

  • 100_4285.jpg
    100_4285.jpg
    1.2 MB · Views: 118
  • 100_4284.jpg
    100_4284.jpg
    1.2 MB · Views: 139

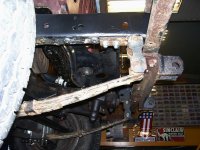
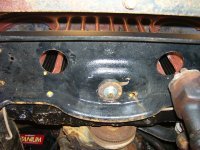
The 1st pic is the front core support, the main reason I took the Jeep to him in the first place. It was not there =P and the hole to put it in, in the cross member was not there either (wtf?) still cant explain why. Did the PO replace the front cross member? And if so, why? Anyway, this was causing me LOTS of problems, as you can probably imagine! I wont get into that now.
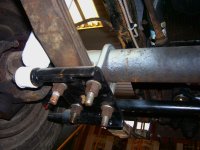
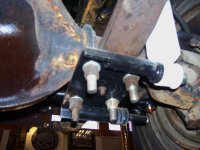
The second pic we replaced the 75 spring (hanger?) and upgraded to 76 and up. Bought some used springs for now. He had to extend the horns to accomodate this mod, and Im not completely sure that the placement is correct. Any feedback on this issue? Its the only questionable work he has done...
 
Note: my signature does say SOA, but we obviously put them back under the axle, requiring new spring plates etc.
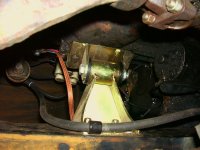
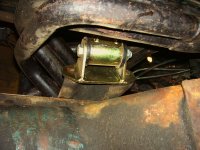
Included pics of MORE bombproof motor mounts (I actually did that job myself!) That was one of my first mods, due to a broken mount, probably caused by the terrible angle of the motor from the former Spring over mod.
 

Attachments

  • 100_4287.jpg
    100_4287.jpg
    991.6 KB · Views: 126
  • 100_4288.jpg
    100_4288.jpg
    890.9 KB · Views: 123
  • 100_4289.jpg
    100_4289.jpg
    1.1 MB · Views: 129
  • 100_4290.jpg
    100_4290.jpg
    1.2 MB · Views: 113
I realize I am prob bombarding my thread with posts, but my pc is a pos, and since it is cooperating today (and I have a day off) I thought I would take advantage of that.
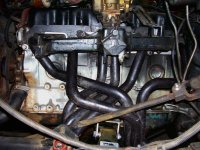
Heres a pic or two of the headers I installed (yes "I") I am proud of these repairs since before I owned this Jeep, I never even did an oil change myself.
I had to replace them because the old ones had a hole worn into them, from the steer (shaft?) again due to the angle of the engine.
I am not a mechanic, so my lingo is sometimes off. Bear with me.
 

Attachments

  • 100_3577.jpg
    100_3577.jpg
    1.1 MB · Views: 114

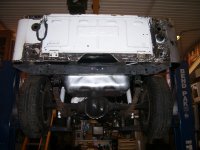
New fuel tank installed. You can also see in this pic the tailgate and left far rear corner panel. These are pretty much the only original metal left from the cowl back.:shades:
 

Attachments

  • 100_4282.jpg
    100_4282.jpg
    1.3 MB · Views: 122
On a roll now, so I guess Ill post all the bodywork.
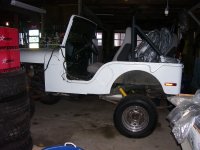
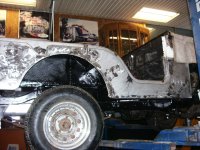
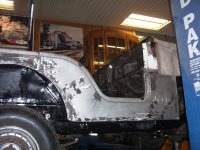
Heres a couple b-4 pics of Frankenjeep...
The PO put replacement sheetmetal on over the old rotted panels with sheetmetal screws, and smoothed it out with some kind of plyable body putty. (what a mess)
Oh, and theres some kind of "repair" to the lower inner windshield frame that covered a hella mess, and there wasnt anything holding the windshield upright except the bikini top!
 

Attachments

  • 100_4028.jpg
    100_4028.jpg
    1.3 MB · Views: 124
  • 100_4030.jpg
    100_4030.jpg
    1.3 MB · Views: 115
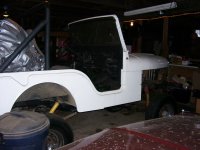
Afew pics of the new panels, SWEETNESS!
 

Attachments

  • 100_4268.jpg
    100_4268.jpg
    1.2 MB · Views: 121
  • 100_4269.jpg
    100_4269.jpg
    1.2 MB · Views: 118
  • 100_4270.jpg
    100_4270.jpg
    1.2 MB · Views: 110

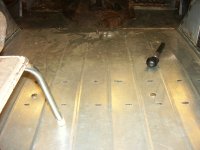
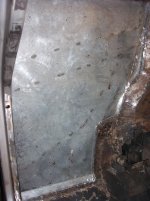
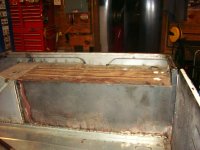
Rear floor was weak, but I hesitated because a relacement was $425. He made one from galvanised steel, and even put the rolls in for me for like a hundred bucks!!!
 

Attachments

  • 100_4263.jpg
    100_4263.jpg
    1,022 KB · Views: 111
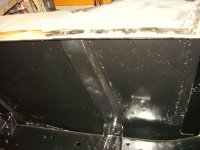
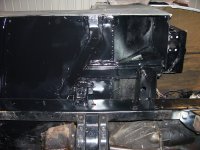
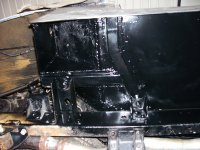
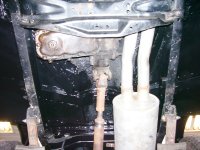
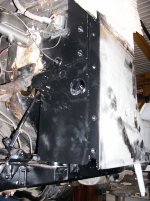
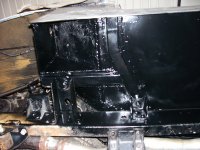
Underside with floor supports, (some bought, some fabbed), and painted with choo choo paint :welder:
 

Attachments

  • 100_4272.jpg
    100_4272.jpg
    1 MB · Views: 119
  • 100_4275.jpg
    100_4275.jpg
    1.3 MB · Views: 120
  • 100_4274.jpg
    100_4274.jpg
    1.1 MB · Views: 110
  • 100_4278.jpg
    100_4278.jpg
    1.2 MB · Views: 106
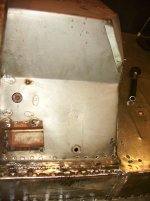
Repair to the cowl on drive side where it was kinda yuckified... see the nice smooth new holes to attach the fenders? (happy) He did this on both sides btw.
Yay, new master cyl, which even needed modified (new part!) the top didnt tighten down, had to fab a thicker gasket. Even the new stuff needed worked on! Jeeeez! :roll:
 

Attachments

  • 100_4271.jpg
    100_4271.jpg
    1.1 MB · Views: 121
  • 100_4274.jpg
    100_4274.jpg
    1.1 MB · Views: 112

Just wanted to say thanks for sharing your project jeep with us ! :coolpics: I think your jeep is coming along just fine , I also think that your taking it at your pace ( time and $) and that's the way to do it too . Your jeep is turning out to be a prize and I don't think perfection should be rushed. Your using quality parts and workmanship , workwomanship too, I just know when it's done , you'll be glad you did it your way. That choo choo paint will protect from having to do this resto all over again . That's the way to . I'm all for saving and preserving CJ , just wish I could come up with a couple of bucks to start my own but hoping all the survivors get treated this well . Hope everyone has the same initiative as you to restore to best of your ability and the best a CJ deserves ! I know you'll smile every time you look at your jeep and commence to get working on it , you really should be proud it's turning out so well . You ought to give yourself a lot of credit for going from not being able to wrench to accomplishing so much with excellent results .
I will say your using all the good parts and once all the resto work is done to the body , the rest is bolt off and on . That's enough work right there , as you know. I see your point on the frame horns , before I read that part of your post , it caught my attention . If the front axle still sits in the original position , and It looks like it is or the driveshaft and steering linkage and all would have heavy mods as well , the only issue I think would be the effect on the ride , off and on road. Short springs ride harder than longer springs so let's see how it all works out. Once it's done , you'll road test the daylights out of it and you'll have your answer then. Until then , just keep making us proud ! I'll be following your build like your following the electrical thread / wiring harness job . Thanks for sharing your pride and joy with us :welder:! My best , Greg .

P.S. - don't worry too much about taking up space , heck , this is a jeep forum , not NASA , I guess it's all right , right ? Besides , they'll have to bet us both anyway , look at my long winded post ! I think I got a rep for that .
 
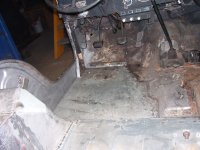
L and R floor pans. Sadly had to part with signature under seat tool box, but it was so mucked up with bondo and an attempted fiberglass job that we just eliminated it altogether. Which also meant fabbing up the seat brackets to reach down to the new floor.
 

Attachments

  • 100_4264.jpg
    100_4264.jpg
    1.2 MB · Views: 122
  • 100_4265.jpg
    100_4265.jpg
    1.3 MB · Views: 113
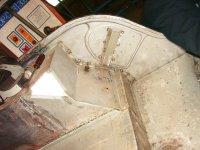
Traded a spare grill for a pair of rear fenderwells that were in good shape. partialy replaced in the bad spots.

In the 2nd pic you can see my transfercse shifter laying on the floor. Yea, that to a gummed up frankenwelded mess (why? no idea!) Made a new one, but its not on yet cause he is repairing that hump area that was poopy.
 

Attachments

  • 100_4266.jpg
    100_4266.jpg
    1.1 MB · Views: 117
  • 100_4298.jpg
    100_4298.jpg
    1 MB · Views: 122
  • 100_4299.jpg
    100_4299.jpg
    1.2 MB · Views: 117

In this pic Johnny Bravo (fab guy) taping off the widshield hinges so he can weld that bar in that goes up inside the 75 frame. Had to cut them out of the old one. Traded a pair of lift springs for a frame from an old firehouse jeep, which comes with another short story we will cover later. lol

In the bottom of the pic Kev kindly spent that Saturday scraping the gooky muck from floorboard area so it can be sanded down and rhino lined.

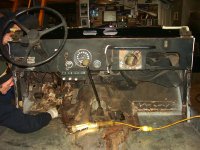
Wow, look how ugly my dash is! Any ideas guys?
 

Attachments

  • 100_4297.jpg
    100_4297.jpg
    1.2 MB · Views: 119
You may have already saw quadratechs replacement for $170 , but you'll have to bore out your own holes for gauges , column and all . I'd like to see another members dash if they got an idea for maybe a more modern approach , but that's only if you want to . I like the CJ as they came factory , but that's just me . Might not take too much effort to weld in some patch panels to where someone probably had a speaker on the shotgun side and grind a nd smooth it then prime and paint ?
 
Man why did/do so many Jeep owners slaughter their dash boards???? wish I had a dime for every one that I've owned/seen that some PO cut a speaker/radio hole in.
The only new replacements I've seen are for newer CJS('76-'85) or with no holes. I think I might try patching that one as greg92jeepxj mentioned....Just my opinion.
On a side note the heater controls look pretty good on that one.
Oh yeah...I almost forgot to mention....you're project is coming along nicely(if not as fast as you'd hoped)....keep on pushin'
 

Thanks for the support and interest in my build guys! Im pretty excited at this point! I think youre right about repairing the dash, they are impossible to find new, and too much work to drill out yourself. Plus it will be original, which is what im shooting for. Ive seen Jeeps with new stainless dashes, but thats a little too flashy for me. I might be able to put a speaker back in that hole and cover it up? We'll see. Oh I also aquired an original dash pad a couple years ago that is mint! :piratenanner:

 
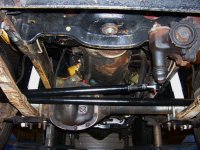
Heavy duty tie rod and drag link. Again, bent up parts that needed replaced due to the half ass soa. Need to make a steering stabilizer to fit it.
 

Attachments

  • 100_4286.jpg
    100_4286.jpg
    1.2 MB · Views: 120
Above pic note clean diff cover. Last week pulled it off to change the fluids, and gaskets... Bone Dry! John and Kev said it was like opening an egyptian tomb! Dust and spider webs, theyve never seen anything like it. Kev got sick afterward for like a week, and swears some kind of mummys curse was released from it! The rear, as you would expect, wasnt much better, like someone filled it with snack pack pudding, discusting! All better now though, repacked the wheel bearings to, hub bearing seals, brake hardware kits all the way around, pads, and stainless lines. but I think I need new drums in the back cause theyre worn real weird and prob cant be turned.
 

Just want to say thanks to all participants on this build as I am always very interested in a CJ build since it is still my hopes to land one in this lifetime before the mothership comes for me ( just playin') and I totally appreciate everyone who is involved in my favorite charity ; preserving the CJ , the greatest jeep ever next to the MB and GPW ! Real sorry though that some of the original jeep signature sheet metal was up salvageable , that really must have hurt . I'd be bummin' too . Bottom line is , it's your jeep and I will personally respect how you build it as long as you love it ! I know that's not asking much as after all , this is a labor of love ! Rock on shewilly !

P.S. - our best to kev
 
Back
Top