Leaky brake help

TJoffroadr

New member
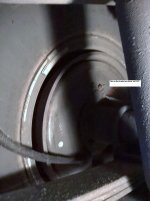
So..... Yesterday my dash brake warning light came on like the E brake was engaged. Well I looked and fluid was kinda low. I jammed the brake pedal real hard this morning and sure enough it went off. Guess the proportioning valve was confused. Any who when I did that I checked for leaks and bam. My rear left brake drum had fluid pall over it coming from the brake line. I guess this mans the seals on the wheel cylinder are gone? How difficult it is to replace a wheel cylinder??
 

Sorry to hear about your brake failure. Not knowing what year and model your jeep is , I assumed from your avatar that it is a TJ with a Dana 35 ? You posted its a wheel cylinder so again assuming your jeep does not have rear disc brakes. Ok , first , wheel cylinders and brake calipers really should be changed in pairs as they wear together and will fail pretty close together. I've seen it before. Plan on swapping out both together. With the tire and drum off , you will have to disassemble the brake shoes and hardware. Hope you have the necessary tools for servicing rear brakes . I get by with electrical pliers and vise grips but you should have a few of the proper tools. Hold down washers are a little tricky and pull back springs are a little tough without the right tool to remove and replace. You won't need much to do rear brakes but having the right tools for them will save time , aggravation and your fingers. With the brakes disassembled , use penetrating oil on the brake line where it threads into the wheel cylinder from behind the backing plate. You may want to do this each day , starting days before you plan on doing the job. This area is known to accumulate surface rust. Especially the brake line. To remove the brake line , you should have the proper size flare wrench , an open end will strip the threaded nut that is supposed to spin on the brake line. When using penetrating oil on the line , wet the threads into the cylinder and the line where it goes through the nut. Remember , it must spin on the line. If not , the line will twist when you break the torque of the nut to the wheel cylinder. Vise grips will work but apply too much pressure which squeezes the nut and causes binding on the line and will not let the nut spin freely on the line as it should. You really want to break up that rust and want the nut lubricated well to unthread from the wheel cylinder and to spin on the brake line. You don't want to wreck a good brake and make another job for yourself. Do check the line for rust and rot as well . Sometimes the need to be replaced as they will spring leaks . Happens to older vehicles , but may also happen to jeeps if you encounter mud , water crossings and get dirt all over the undercarriage and do not clean it often enough . Once the nut spins freely ( thank you Jesus) , you can remove what secures the wheel cylinder to the backing plate. Older vehicles had spring clips that held the cylinder to the backing plate but you should find two small bolts . And yes , you want to pre-lubricate the bolts when you begin days before using penetrating oil on the line . This will make the job go faster and hopefully life easier to. Once removed , clean the area with a wire brush but take care to plug the brake line with an appropriate size plug if you can to avoid losing brake fluid and making a mess for yourself to work in . Please do be prepared with a can of brake cleaner spray. Large cans are better ( a little pricey) but we tend to get happy with them and you have to do two sides. Thread the brake line into the wheel cylinder first but not tight yet . Then , thread the bolts back through the backing plate into the wheel cylinder . Now you may properly tighten but not over tighten the bolts and line nut. A word about threads ; if you do not have , please get anti-sieze compound and apply lightly to all threads bolts and line nut. Do not get any into the wheel cylinder , just the outer edge of the threads where it threads into the wheel cylinder and a little on the line where the nut spins over it. You may have to go back in and disassemble this someday for another reason and thank yourself you took this precaution toward easy disassembly. Also, it is a good idea to apply lightly anti-sieze compound to the threads of the bleeder screw where it threads into the wheel cylinder. Lightly so as not to et any into the wheel cylinder. Tighten mounting bolts first and line second. Reassemble brake shoes and hardware . Installation reverse of removal. Lubricate the self adjusting star wheel threads with lithium grease or what's recommended at the parts store. Lubricate the contact points on the backing plate ( usually 3 points per brake shoe) so brake shoes do not bind. Feel free to lightly lube any part that will move when brakes are applied . Self adjusting hardware , spring attaching ends , anything that will move upon brake application . Adjust star wheel self adjuster so brake drum just slightly rubs on brake shoes but does not bind or drag. You may have to grind down the lip on the outer edge of the drum to make brake drum removal and replacement easier , the inner lining surface wears the drum but not the outer edge making removal and replacement of drum harder. You could adjust the star wheel to get shoes out to drum but trial and error fit taking drum on and off and clicking star wheel to expand shoes but your supposed to access star wheel from behind backing plate with a brake adjusting tool ( brake spoon) . An oblong rubber plug usually plugs the access hole . Replace to prevent infiltration of water and dirt . Enough water and dirt get into you brakes , why help it to get more ? Finally , you MUST bleed the new wheel cylinders of air . A mity-vac pump works well but a second person to step on the brake pedal to force out air and confirm all that escapes is DOT 3 fluid ( check owners manual) and no more air. To bleed ; top off master cylinder first. Have assistant pump brake pedal until pedal gets as firm as it can . It won't get too firm , there is air in the line and cylinder. When assistant get pedal firm as possible , hold pedal as you open bleeder screw. Don't get splashed ! Assistant MUST hold pedal down until you tighten bleeder screw. If not , air will get sucked back into brake system . As soon as you see the air come out and fluid with it and pressure starts to die down , tighten bleeder screw . Repeat this step until your certain only fluid escapes and air is no longer present and brake pedal firm. Repeat other side. Forgot to mention , before assembling wheel cylinder to backing plate , clean off backing plate where brake parts attach to with brake cleaner and wire brush. You want everything clean but do not wash off any applied lithium grease or anti-sieze compound you just applied . This all sounds tricky but work methodically and you will make sense of this whole procedure. Yes , of course a good repair manual is gold. You'll want a reference so you don't get stuck in the middle of the job. You must remember where parts go back upon reassembly to avoid improper reassembly. Take a picture before disassembly . It really helps. You'll be surprised. Best of luck to you . Stay safe. Greg
 
My apologies to the administrator and/or moderate who will proof this post . ZZZZZZZZZ !
I know , either you'll bill me or suggest I start my own forum and proof my own threads and posts. Lol . Not happening , that's too much work policing our sorry hides.
 
That post is awesome man! Thanks a bunch. I'll update my Jeep info if you want to look at it. I haven't had time to do it yet.
 

Your most welcome . Wishing you a successful job . Please work safe, invest in proper tools for this job so we don't hear of a emergency room visit or cussing above your breathe and your neighbors hear it . Lol
 
Last edited:
Thanks for posting these details Greg! I'm just about to get to the bottom of the leaky rear extension lines (rubber/vinyl) from the crossmember on my '78 CJ 5. Going to post pics when I have the time.
 
Your most welcome mr. Turbogus ! Hope this is helpful to you . Since we never saw a follow up from the member who started the thread , we'll never know if was helpful to that member. May you fare well on your repair sir. Will look for your posting and pic's .
 

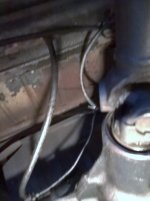
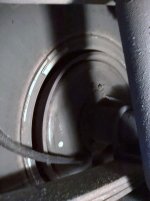
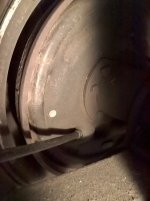
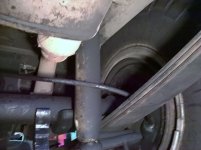
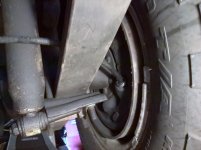
I jacked up 'BB' last night (lost one of my damm jackstands) and took a few pics before I begin.
WP_20160517_18_24_19_Pro.jpg
from under the differential
WP_20160517_18_24_24_Pro.jpg
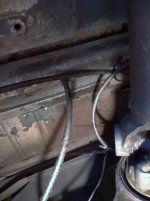
..another closer up
WP_20160517_18_24_33_Pro.jpg
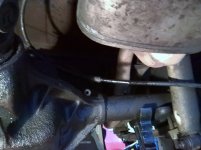
To the left of the differential
WP_20160517_18_24_39_Pro.jpg
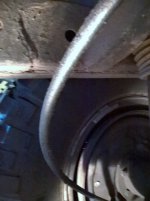
close up near the right hub
WP_20160517_18_24_55_Pro.jpg
...slightly better angle
WP_20160517_18_25_11_Pro.jpg
I think this is the parking brake
WP_20160517_18_25_31_Pro.jpg
left side parking brake?
WP_20160517_18_25_43_Pro.jpg
...close up

To be honest I don't know what I'm looking at, over the course of the last month I've been in an accident that totalled my van, had a stuck intake valve on the jeep, the carb on the jeep was subbed out to a carb "expert" that botched the rebuild 3 times, bought another truck, motor went bad in it (being replaced by the shop) so as you all can imagine I'm more than a little dizzy (still working 7 days per week),
 
Last edited:
Hopefully it's just the crimp on the hydraulic hose that is leaking . Please inspect the hard line above the crossmember ( difficult to see from the photo , probably more difficult to access , sorry ) for any corrosion and/or leaks . Spraying brake fluid from a leak over time causes decay of the hard lines and any metal or body panels it comes in contact with. Swell , I know. May I suggest cleaning any brake fluid wet areas with a brake cleaner solvent to prevent further corrosion of your precious CJ body and chassis ( I have a weakness for CJ's) and to further diagnose the leak. Once it's clean , press the brake to find where the leak originates . Hoping this repair won't involve any metal line replacement. If you have to " jump a line " , please use proper flares and unions , not compression fittings . I know , I've used them countless times ( I think I still got one on my '92 Cherokee ) but we should refrain from using them. If you must perform a flare , get one of those cal van tools that are hand held and don't have the flaring bar. You will find that working in tight quarters is kinder with this tool . It is supposed to make a better flare than the cheap flaring tools sold at the chain store auto parts stores . I've been personally meaning to get a master set myself but like everyone , priorities take precedence. A flare nut and a union make a threaded connection as opposed to a compression which is said to be a recipe for disaster and not legal in many states upon inspection .
 
BTW , yes , the thick cable like lines going into the backing plate below the axle tube are your parking brake cables . The hydraulic line(s) will be your fluid lines into the wheel cylinders . I did not re-read my first post in this thread to see if I mentioned my preferred method to loosening hydraulic line nuts from their threaded connection was PB blaster or liquid wrench and a #5 vise grips . If the nut has any chance of spinning on the fluid line and corrosion hasn't welded it permanently to the line , penetrating oil and time will prevail. Hoping your hydraulic lines are in good shape.
 
I'm thinking that not all of the wet crud is brake fluid in pulling and repairing the cylinder head I noticed an oil leak at the intake manifold that may have drifted back, keeping an oil film on my underbody helping to prevent rust? :p

I think I'm going wrong by trying to see the brake lines in front of the rear differential, most of the pics I've seen on the web show the lines aft of the rear axle.
 
Last edited:

yes sir , that the hydraulic hard line . Right above it is the bleeder screw . Be careful when it comes time to open the bleeder screws , they always freeze up from rust . Clean the threads that are visible well and wet them down with penetrating oil and let it soak in a good while . Clean out the hole with a drill bit or something suitable too and wet that down also . Given enough time , you stand a good chance of opening them without snapping them off. All depends how corroded they look . A good idea is to place a drill ( the shank end ) bit that displaces the inner diameter of the bleeder screw should you find it necessary to grab them with a vise grips . That'll help keep them from snapping off since their hollow.
 

I'm thinking that not all of the wet crud is brake fluid in pulling and repairing the cylinder head I noticed an oil leak at the intake manifold that may have drifted back, keeping an oil film on my underbody helping to prevent rust? :p

I think I'm going wrong by trying to see the brake lines in front of the rear differential, most of the pics I've seen on the web show the lines aft of the rear axle.

It's funny , but yes , oil leaks do coat surfaces and slow or prevent rust. On the other hand , the opposite has occurred due to the ability of the oil trapping dirt and moisture causing corrosion. A clean surface obviously is always best. As far as the brake line routing , the rear line comes down the left side chassis rail and across the rear crossmember to the hydraulic flex hose to a tee which splits brake lines across the upper surface of the axle tubes to each wheel cylinder . That's the correct routing. The tee could be mounted by a differential inspection cover screw by means of a bracket of mounted in the center of the crossmember or off to one side and the tee will be mounted on an axle tube with a through bolt into a tapped hole into the axle tube. Dana and AMC axles have inspection covers as I think most if not all CJ differentials had . Can't think of a diff a stock CJ would have that wouldn't have an inspection cover. Got me thinking , the next time I crawl under my '73 CJ project , I'll have to check on that . Got a Dana 30 up front and a 44 on back . Guess you do too. You would think after a rear main seal , a clutch replacement and u-joints front and rear ( got to do the front axle u-joints yet ) I would have taken note to the brake lines. I'll get to it. Got to rebuild the carter one barrel this weekend ( still searching for a two barrel motorcraft to compliment my two barrel intake/exhaust combo ) , will try to remember . Lots to do on this jeep $$. It's camera shy now , will start a thread on it when I get to the floors. Just leaking info , spoiling the surprise !
 
Last edited:
Last night I stopped by Harbor Freight and got a bleeder kit. It didn;t pull enough vacuum for what I was trying to accomplish so with the help of my wife we got the lines filled the old fashioned way. The bleeder screws came free pretty easily with a 3/8 inch socket broke them loose and we were off to the races. Following final bleed out the pedal response was fine and the brake light went out. Going to check my work tonight and follow the lines. I can't conceive that the master cylinder was down to nothing and there was no apparent leak but I'll have a close look at the combination valve and the rest of the lines tonight.
 
i just bought a master cylinder for the 98 cherokee. fluid has been disappearing with no trace. found the inside of the vacuum booster line, from the intake to booster, coated with brake fluid. that is another spot to check.
 

I'll go with that . The first place to look for a leak if none is found on the brake lines and hoses or wheel cylinders and calipers would be the rear seal of the master cylinder . Rust is a dead giveaway . If you've got power brakes then brake fluid is sure to make its way into the power booster . I actually never seen this happen to any vehicle I've ever serviced but remember a vehicle in the scrap yard that had fluid stains on its booster on the six O'clock position and thought that was extreme. Something to check , I agree .
 
Back
Top