So as I've posted on the site many, many times I own an '06 TJ that is currently running a 4" suspension/1.25" body lift and too many odds and ends and different components for me to bother going into here. Suffice it to say, it's kind of a piecemeal suspension but it turned out great and works very well on the terrain we have here on the east coast.
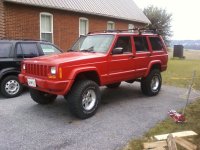
Anyway, the reason I'm posting in the Cherokee forum for the first time is that I work with a guy that owns a '98 XJ. It has something like 250,000 miles on it, but he put a fresh 4.0L engine in it a few years ago. Anyway, the suspension is beyond beat and so he hasn't been able to go wheeling with me. He's been talking about putting a new suspension on it for a few years and took it to a couple shops a year or so ago and got quotes of $1500-2000 for a 4" lift. He couldn't afford it.
So I've been telling him for the last year that I was sure he could get some sort of 'budget' lift for $400-500 and that for a case of beer I'd help him put it on. He finally broke down and bought a 4.5" lift kit from Zone Offroad a couple weeks ago, and Saturday morning I'm meeting him at his place to install it. It's only going to be the two of us. Just wondered if anybody had any advice or things to look out for. I already told him to start soaking everything in PB Blaster and he said he's already sprayed everything down twice. I've never messed with leaf springs (nor has he) so I'm a bit nervous about how to do the add-a-leaf. He does have air tools (impact gun and ratchet) so that should help.
Any tips would be appreciated!
I'll try to post before/after pics so you can see how it went.