You are using an out of date browser. It may not display this or other websites correctly.
You should upgrade or use an alternative browser.
You should upgrade or use an alternative browser.
1956 CJ5 Build
- Thread starter Ia2003
- Start date
Ia2003
New member
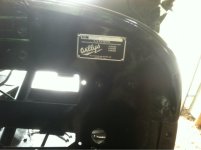
Yes, it is a brand new VIN tag. You can get them at www.kaiserwillys.com . I took it to my local trophy / award shop and had them engrave my VIN on it.
Ia2003
New member
The engine starts with the new SOLEX carb but will only run for a few seconds. I have seen other threads about the Solex carb crapping out right after starting. I'm sure it's a choke and adjustment issue but the carb didn't come with any instructions. Any ideas how to adjust it?
Attachments
Ia2003
New member
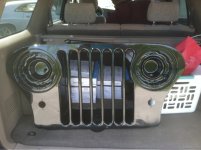
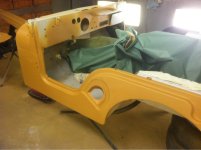
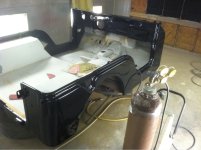
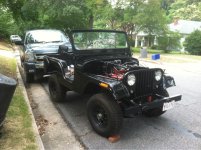
Body work is progressing slowly but surely. The grill is complete and will be mounted this week. The rusted side panel was removed from the body and the new panel has been installed, going to be welded in this week. I am using POR-15's "Hardnose" paint in black. This stuff is indestructible. It is immune to rust, humidity, cracks, chips, etc. plus it looks really good!
Attachments

Last edited:
Ia2003
New member
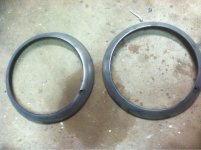
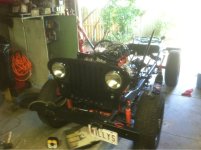
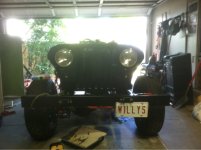
I mounted the grill to the radiator today. I had to cut off about 6 inches from both radiator hoses to get everything to fit right. In that process I had a somewhat severe leak of radiator fluid. Hence the pile of kitty litter on the floor. I sanded the headlight surrounds, prepping them for POR-15. I will be installing headlights, marker lights in the next few days.
Attachments
Ia2003
New member
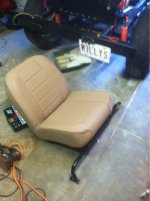
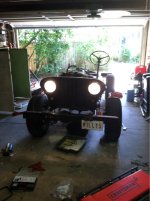
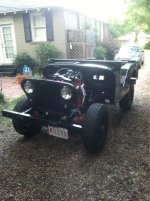
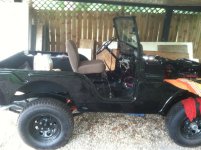
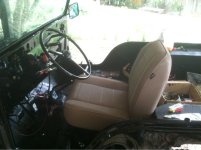
Headlights and marker lights installed and wired. I got two new low back tan seats from Rugged Ridge. I painted the seat frames with POR-15 and mounted the drivers seat to the frame today, passenger seat tomorrow.
Attachments
Ia2003
New member
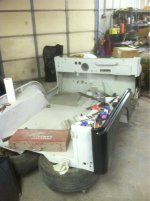
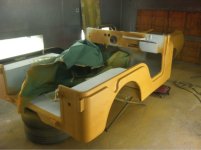
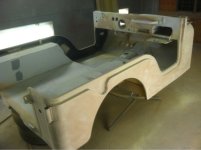
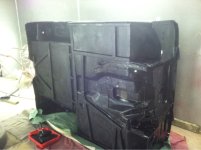
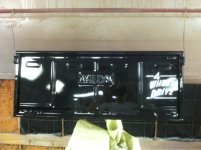
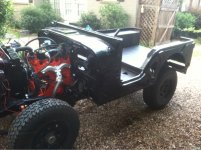
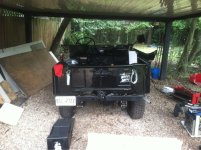
Body tub complete and primed. It has two new side panels. Substantial welding work was done to put the letters, gas tank opening and soft top bow indents into the new panels from the originals. Nobody makes entire side panels fir early CJ5's. Applying POR-15's "hard nose" paint in gloss black tomorrow.
Attachments

SteelHeadz
Super Moderator
Looking really nice!!!
Ia2003
New member
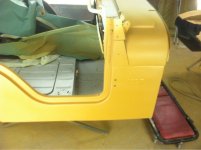
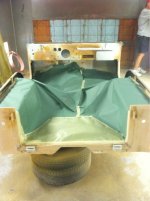
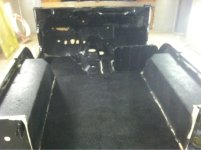
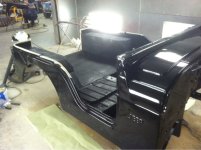
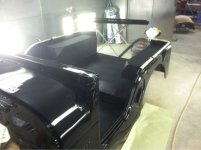
The body tub is complete. I sprayed it with POR-15's "Hardnose paint" and painted the interior and undercarriage with Durabak-18 coating. It turned out very nicely. I also sprayed the windshield frame and tailgate. Fenders and hood are next.
Attachments

sweetpeet
New member
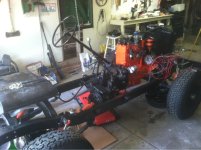
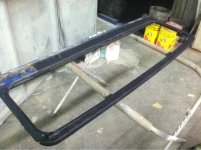
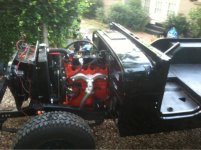
Ia2003 said:After two weeks at the sand blast shop, I finally got the frame back. It looks really good! I applied two coats of POR-15 (pictures to follow). Once all the rust was removed I uncovered the original serial number from the frame (101295). This tells me the frame is from 1955 if it's a true CJ5 frame. It can be from another early CJ from another year but I don't know how to verify its a true CJ5 frame. I also uncovered the engine serial number while disassembling the engine. It is 800885. That number is a 1958 CJ5. Any ideas on why there is a difference in serial numbers? I've been trying to figure out this jeeps true birth year for over a year.
Not sure if this has been answered or not. It's a bass-turd, by the most literal definition. I also have a cj5 and have found that most cj5s that still exist today have been mixed and matched to be kept alive. So don't be suprised if you see more of this in the engine, transmission, original body color, etc...
I really like the build! I wish I'm not done building mine so I'm def gonna use this a bit as a reference.
Oh one more thing, why did you go with the t-90 three speed. I've got the three speed and I hate the thing... I'm thinking bout changing to a 5speed. Was it just because of cost?
Last edited:
Ia2003
New member
Thanks! I have found that much of my Jeep has been mixed and matched. I kept the T-90 for two reasons. First off, starting out on the build I did. It know a whole lot about early CJ5's. I learned everything throughout the course of this build by taking it apart, doing research and getting info from here. I did not really know what a dog the T-90 was. Second, the goal of this build was to restore the Jeep to as close to original configuration as possible. I see plenty of old Jeeps out there chopped up and lifted but it is rare to see a stock looking Willys.
Ia2003
New member

Ia2003
New member
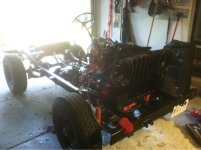
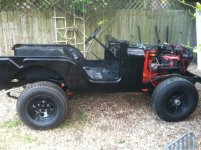
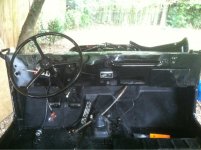
Now that the tub is on I am installing lots of parts. Steering wheel, tail gate, mirrors, turn signal lever, data plates, etc.
Attachments

Ia2003
New member
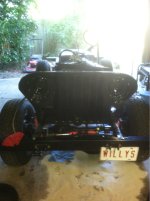
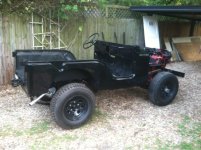
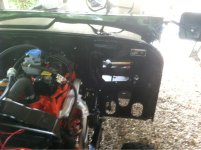
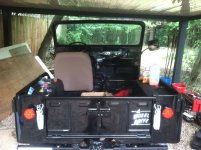
All body components. Except the hood installed. Tail lights, gas tank, air cleaner, fuse block installed.
Attachments
-
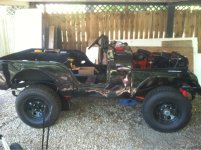 image-3749754814.jpg548.6 KB · Views: 845
 -
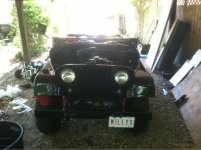 image-97855448.jpg476.4 KB · Views: 633
 -
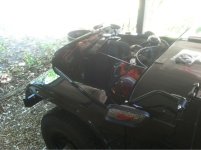 image-3034478876.jpg429.9 KB · Views: 581
 -
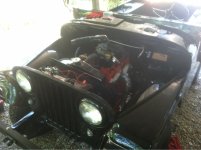 image-2453419952.jpg433.6 KB · Views: 600
 -
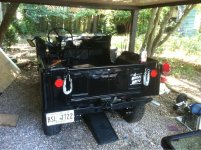 image-2676692073.jpg675.5 KB · Views: 785
 -
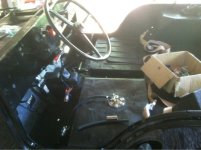 image-1636979793.jpg469.5 KB · Views: 547
 -
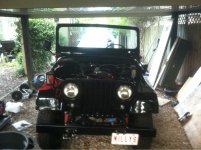 image-560517137.jpg539.2 KB · Views: 605
 -
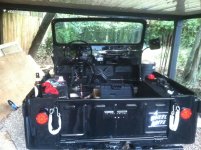 image-512055143.jpg568.1 KB · Views: 610
Ia2003
New member
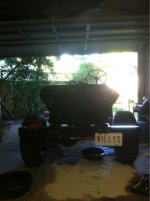
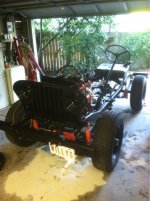
Drivers seat installed. Put the first few miles on it test driving around the block. Tuned the carb and it now runs beautifully. Next up is passenger seat, finish wiring lights and gauges.
Attachments
Similar threads
- Replies
- 3
- Views
- 2K
- Replies
- 8
- Views
- 3K